Search

Hotbox Hipster

a pittsburgh hippie chick's unbridled love for all things food related

Category

pittsburgh food blog

spicy wheat berry chili… with or without sausage… you’re gonna like it!!

005

what berry??  wheat berry.  WHAT??  what the hell is a wheat berry?  this is how the conversation began when I started to tell my hubby about my dinner plans last weekend.  he immediately jumped on the laptop and proceeded to educate himself, and admittedly, me as well… on just what in the hell the wheat berry was.  I saw this recipe that made my eyes widen a bit while looking at Eating Well.com,  on there it was listed as ‘zesty wheat berry black bean chili’… and my recipe is an adapted version.   I tweaked it a bit, but not a ton-   it was a vegetarian recipe to start with… but the omnivore in me felt compelled to start it out with a bit of ground hot sausage, browned well, thus leaving a beautiful crust on the bottom of the pot, only to be ‘deglazed’ right the hell into the mix once the veggies began to sauté over it.  this created a ‘cooked all day’ taste, especially when the chicken broth was added.   so yeah… wheat berries.  this little guy is a superstar in the grain world.   easily put, the wheat berry is the whole grain form of the wheat, in its most natural state before any processing has occurred.  it’s full of fiber, vitamins and minerals.  it brings copper, manganese, phosphorus and selenium to the table.  most of which are hard to find in every day foods.  selenium is great for our immune systems and our thyroid gland, and manganese helps boost our metabolism.  all good, right??  if the pure healthy reputation isn’t enough to convince you, the taste will.  wheat berries have a chewy, almost nutty sweet texture that blend seamlessly with even the boldest of flavors.  they could have easily stood alone here, (they even have protein!)  and  I compel my veggie friends roll with this recipe sans sausage.  just jump right in at sauté the onions, peppers, etc.  (and sub vegetable broth for the chicken broth)  Golden!! have it both ways.

003

the day you’re gonna make this, go ahead and cook the wheat berries ahead of time, as they take one hour to cook.  the preparation?? EASY PEASY LEMON SQUEEZY.   put the wheat berries in a heavy pot. cover with water two inches or so above the grains.  bring to a boil, cover, and reduce heat to low.  simmer for one hour, stirring occasionally.   once cooked, drain into a colander, rinse with cold water and set aside. This recipe calls for two cups- cooked.  I bought two cups of dry berries for 1.99/pound at my local Whole Foods.  i’m guessing any health food store is gonna have these guys.  they were listed as “hard red winter wheat berries” .  when they cook up, they plump a bit- so you end up with more than you need. Add what you think looks right to your stew,  (at least two cups but I did more) and then put the rest in an airtight container to use over salads, etc. for the rest of the week.  heck, they’re so versatile you can even add them to your morning yogurt!  ok, moving forward.

WHAT YOU NEED:

olive oil

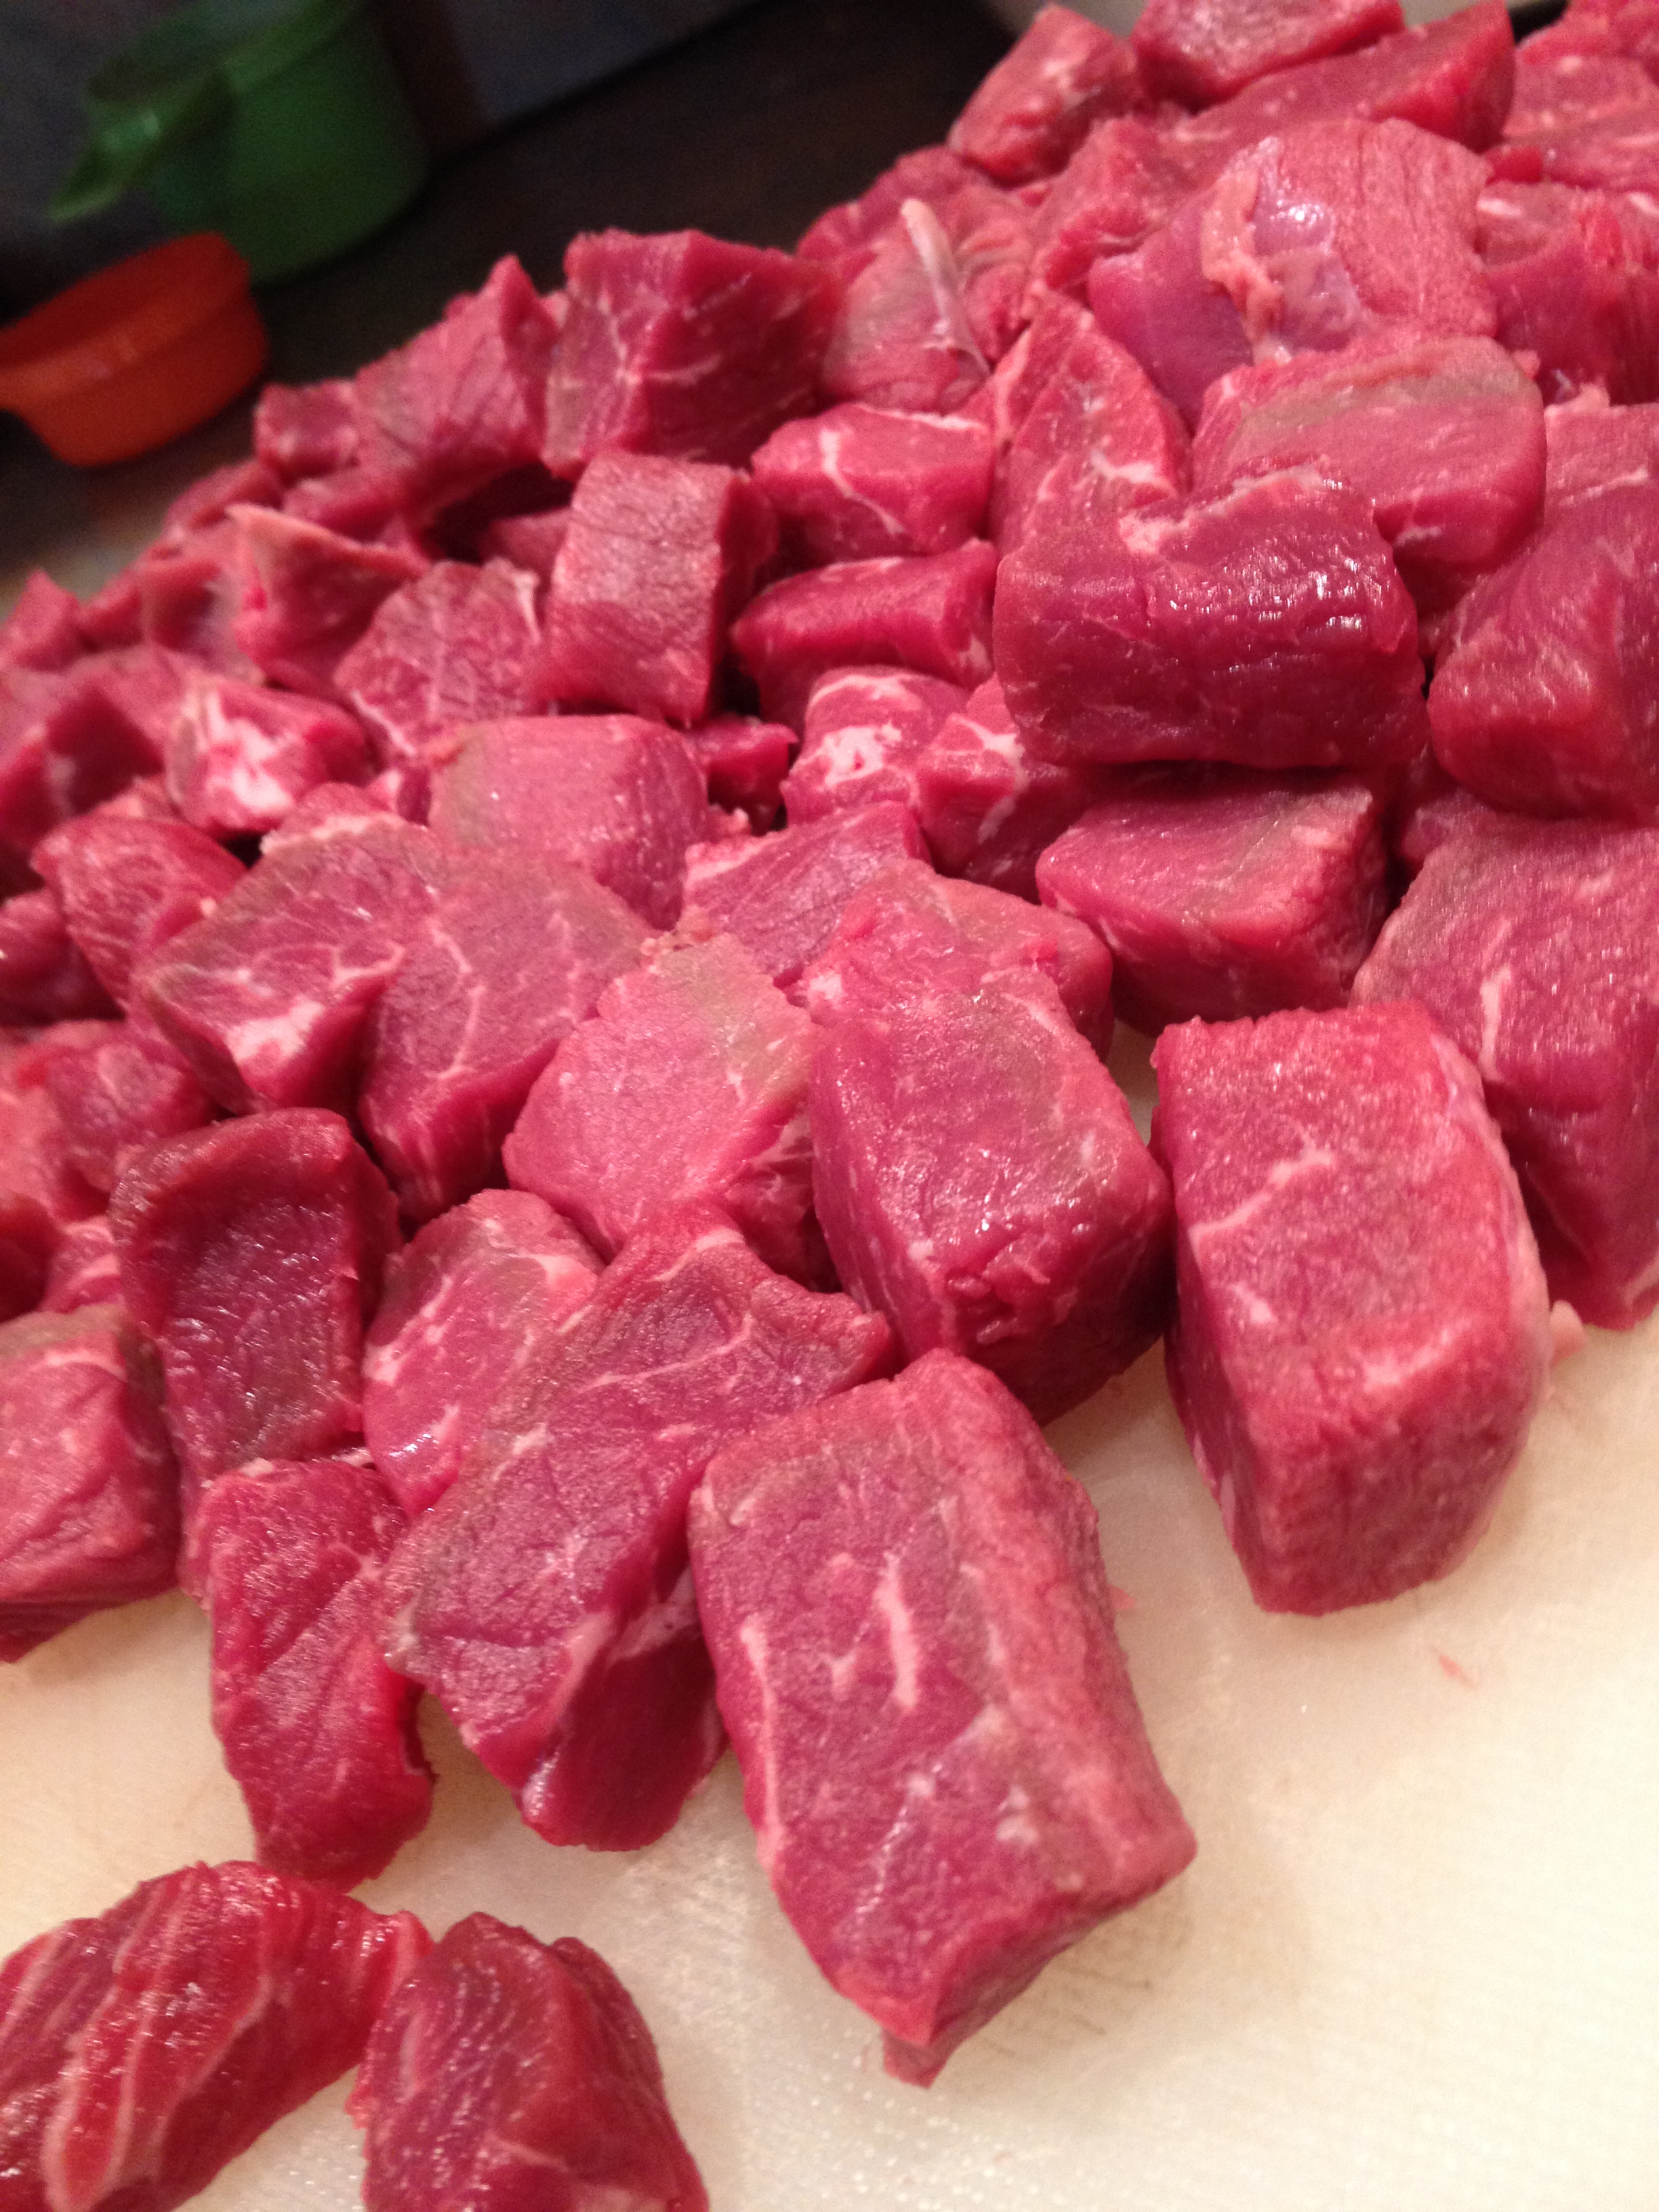
about a half a pound of bulk hot sausage (ground not links) -anything under one pound will do.

1 large yellow onion (diced)

1 jalapeno pepper (seeded and small diced)

1 yellow bell pepper (diced) – (red would work here too, but i’m a ninny and think about the visual of the end product)

1 28 oz can diced tomatoes (undrained)

5 cloves garlic (minced)

2 cans black beans (rinsed and drained)

your wheat berries from above

2 tsp chili powder

1.5 tsp ground cumin
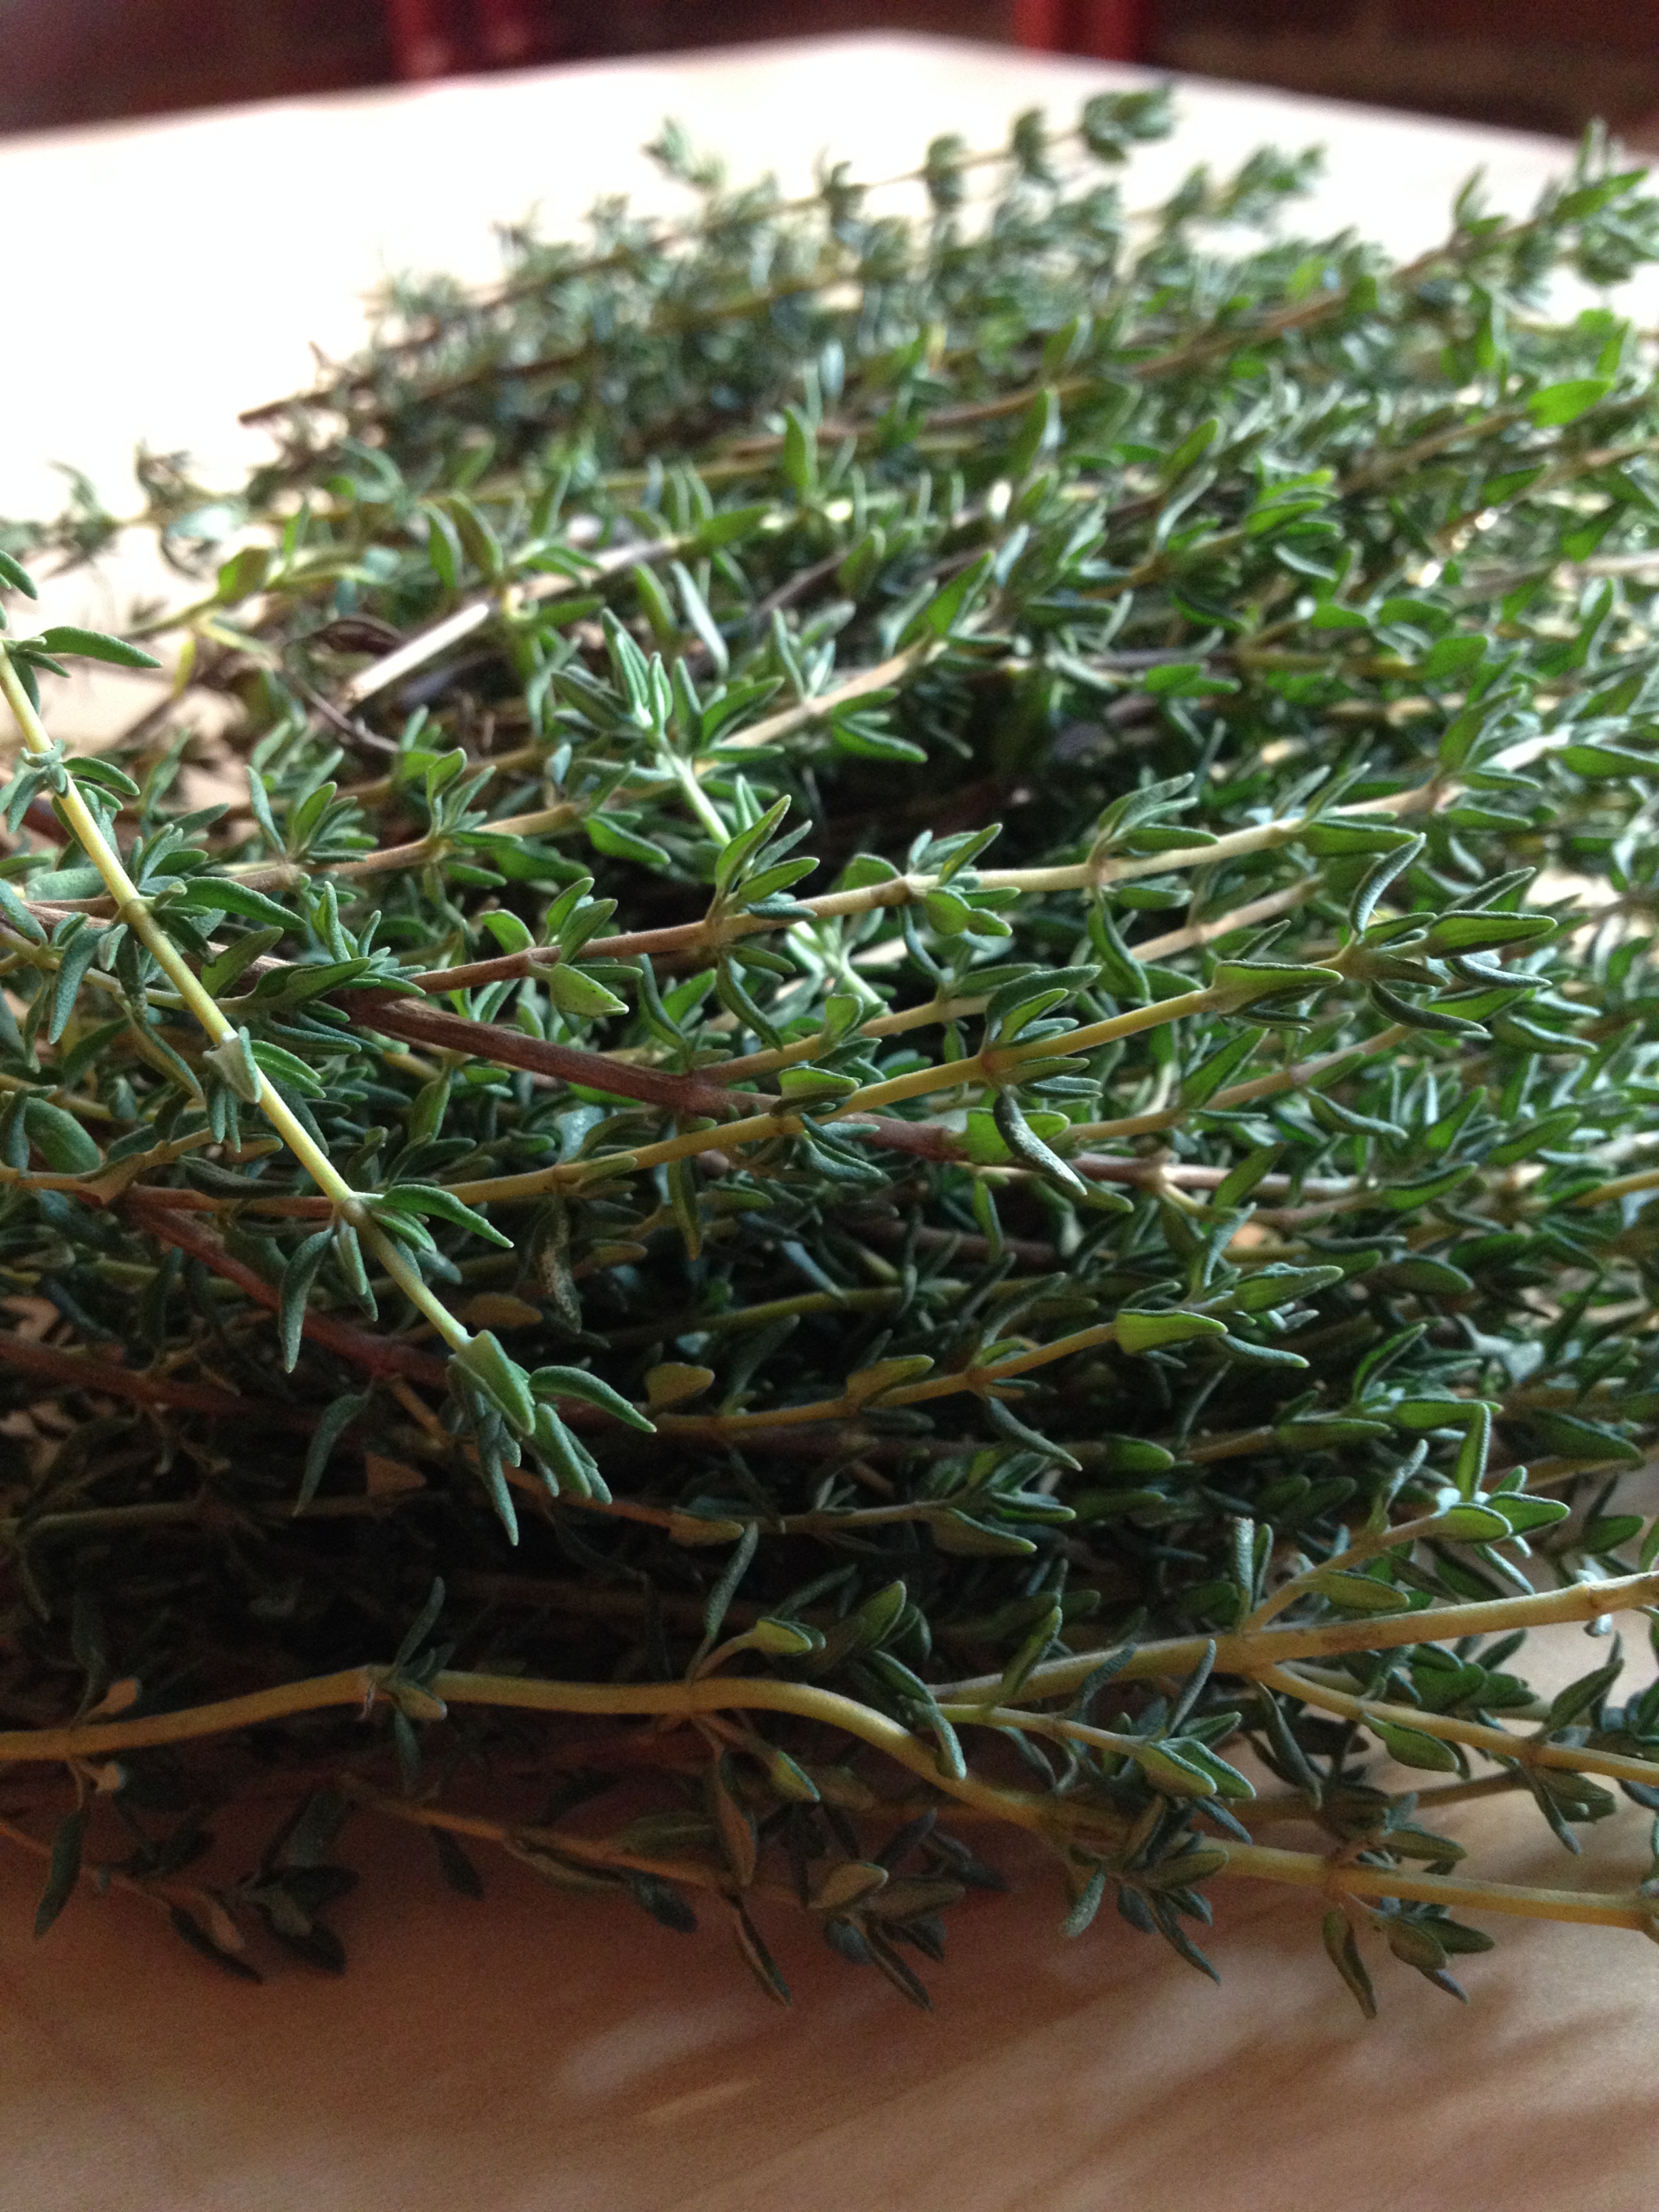
1 tsp dried oregano

1 tsp salt

1/2 tsp black pepper

1 can chicken broth

1/2 cup water

2 tsp brown sugar

1 avocado (diced)

1/2 cup fresh cilantro- chopped

HERE’S WHAT YOU DO:

OK, like any recipe I tell you guys about, I say prep all of your ingredients first, and that way they are waiting on your ass when it’s go time.  trust me, it makes your life sooo much easier when you’re starting out doing these recipes.  it makes it hard to ‘mess up’ that way.   I still cook this way for the most part- and that is probably one of the reasons I keep loving it so much.  the old nursing adage applies here: work smarter, not harder. 

so hit up your pan with some olive oil- just a swirl will do…. and start to brown your hot sausage.  start out at medium high, breaking it up with your spatula as it cooks.  you have to keep at this, flip it around, break it up continuously until it is small lovely browned pieces…. ready to add in later.  remove the meat to a plate, and set aside.  the bottom of your pot should look crusty and a mess at this point.  perfecto.  we are gonna work all of those lovely browned bits into the mix here in a sec.   reduce heat to medium and add your pile of chopped onions.  stir around for a few minutes while they warm up.  add a bit of the diced tomatoes, maybe a 1/4 cup- and continue to try to ‘clean’ the bottom with the ingredients.  add in the bell peppers and the jalapeno and turn the heat up to medium high.  stir for a few mins and then add in the garlic and all of the dry spices.  stir around a few more mins, at this point, your pot should be deglazed, if not, a bit more tomato and make it happen.  once you’ve achieved that, add in your chicken broth, water, diced tomatoes, beans, brown sugar and add the sausage back in.  Reduce heat, cover, and simmer like this for 25 minutes.

002

remove lid, stir well,  and go ahead and add in your wheat berries.  like I said, at LEAST two cups, but I just dumped in what I thought looked good as I gave it a stir. I wanted it to be thick.  it’s your rodeo people…. take charge.

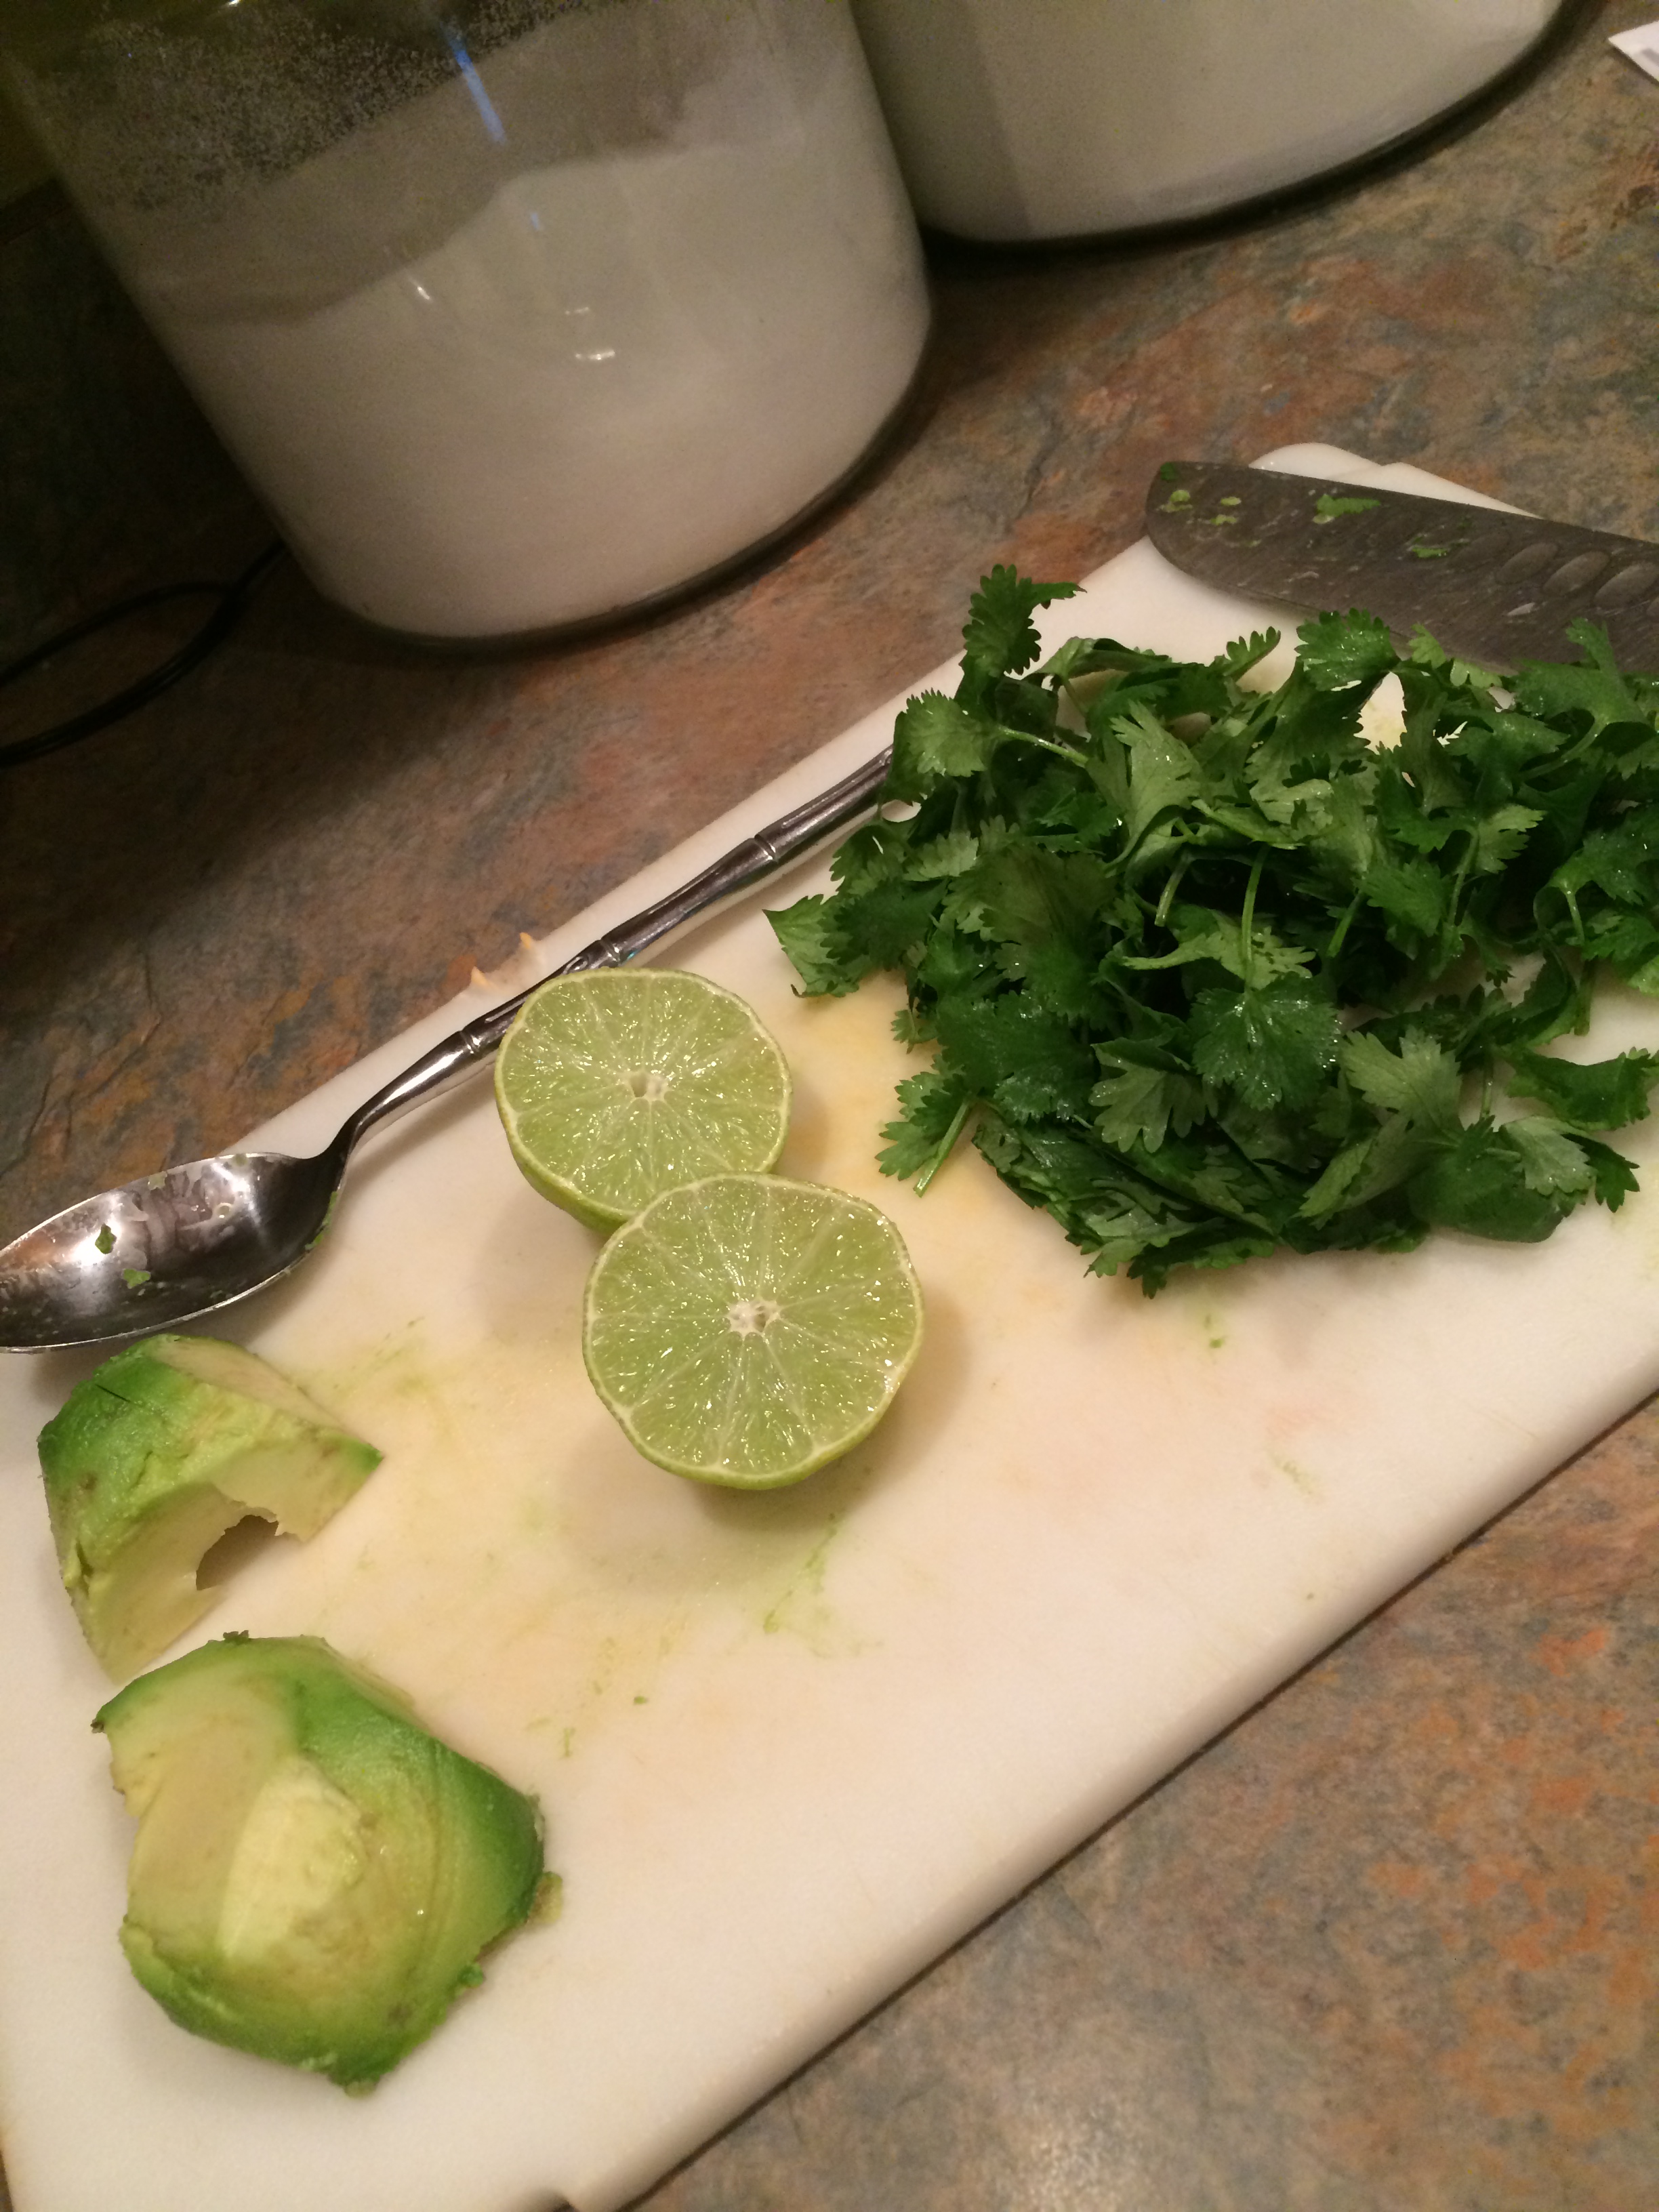
cook it for like 5 minutes more,  and then remove from heat. give it a stir, and then you’re adding in the juice from one whole lime, and at least a half cup of chopped fresh cilantro.  (again, I did not measure, just take a big rip and chop it)  I reserved a smidge of the cilantro to sprinkle on top of the bowls, mostly because I love love love cilantro.   after you stir in your cilantro and lime juice, you’re ready to eat!!

001

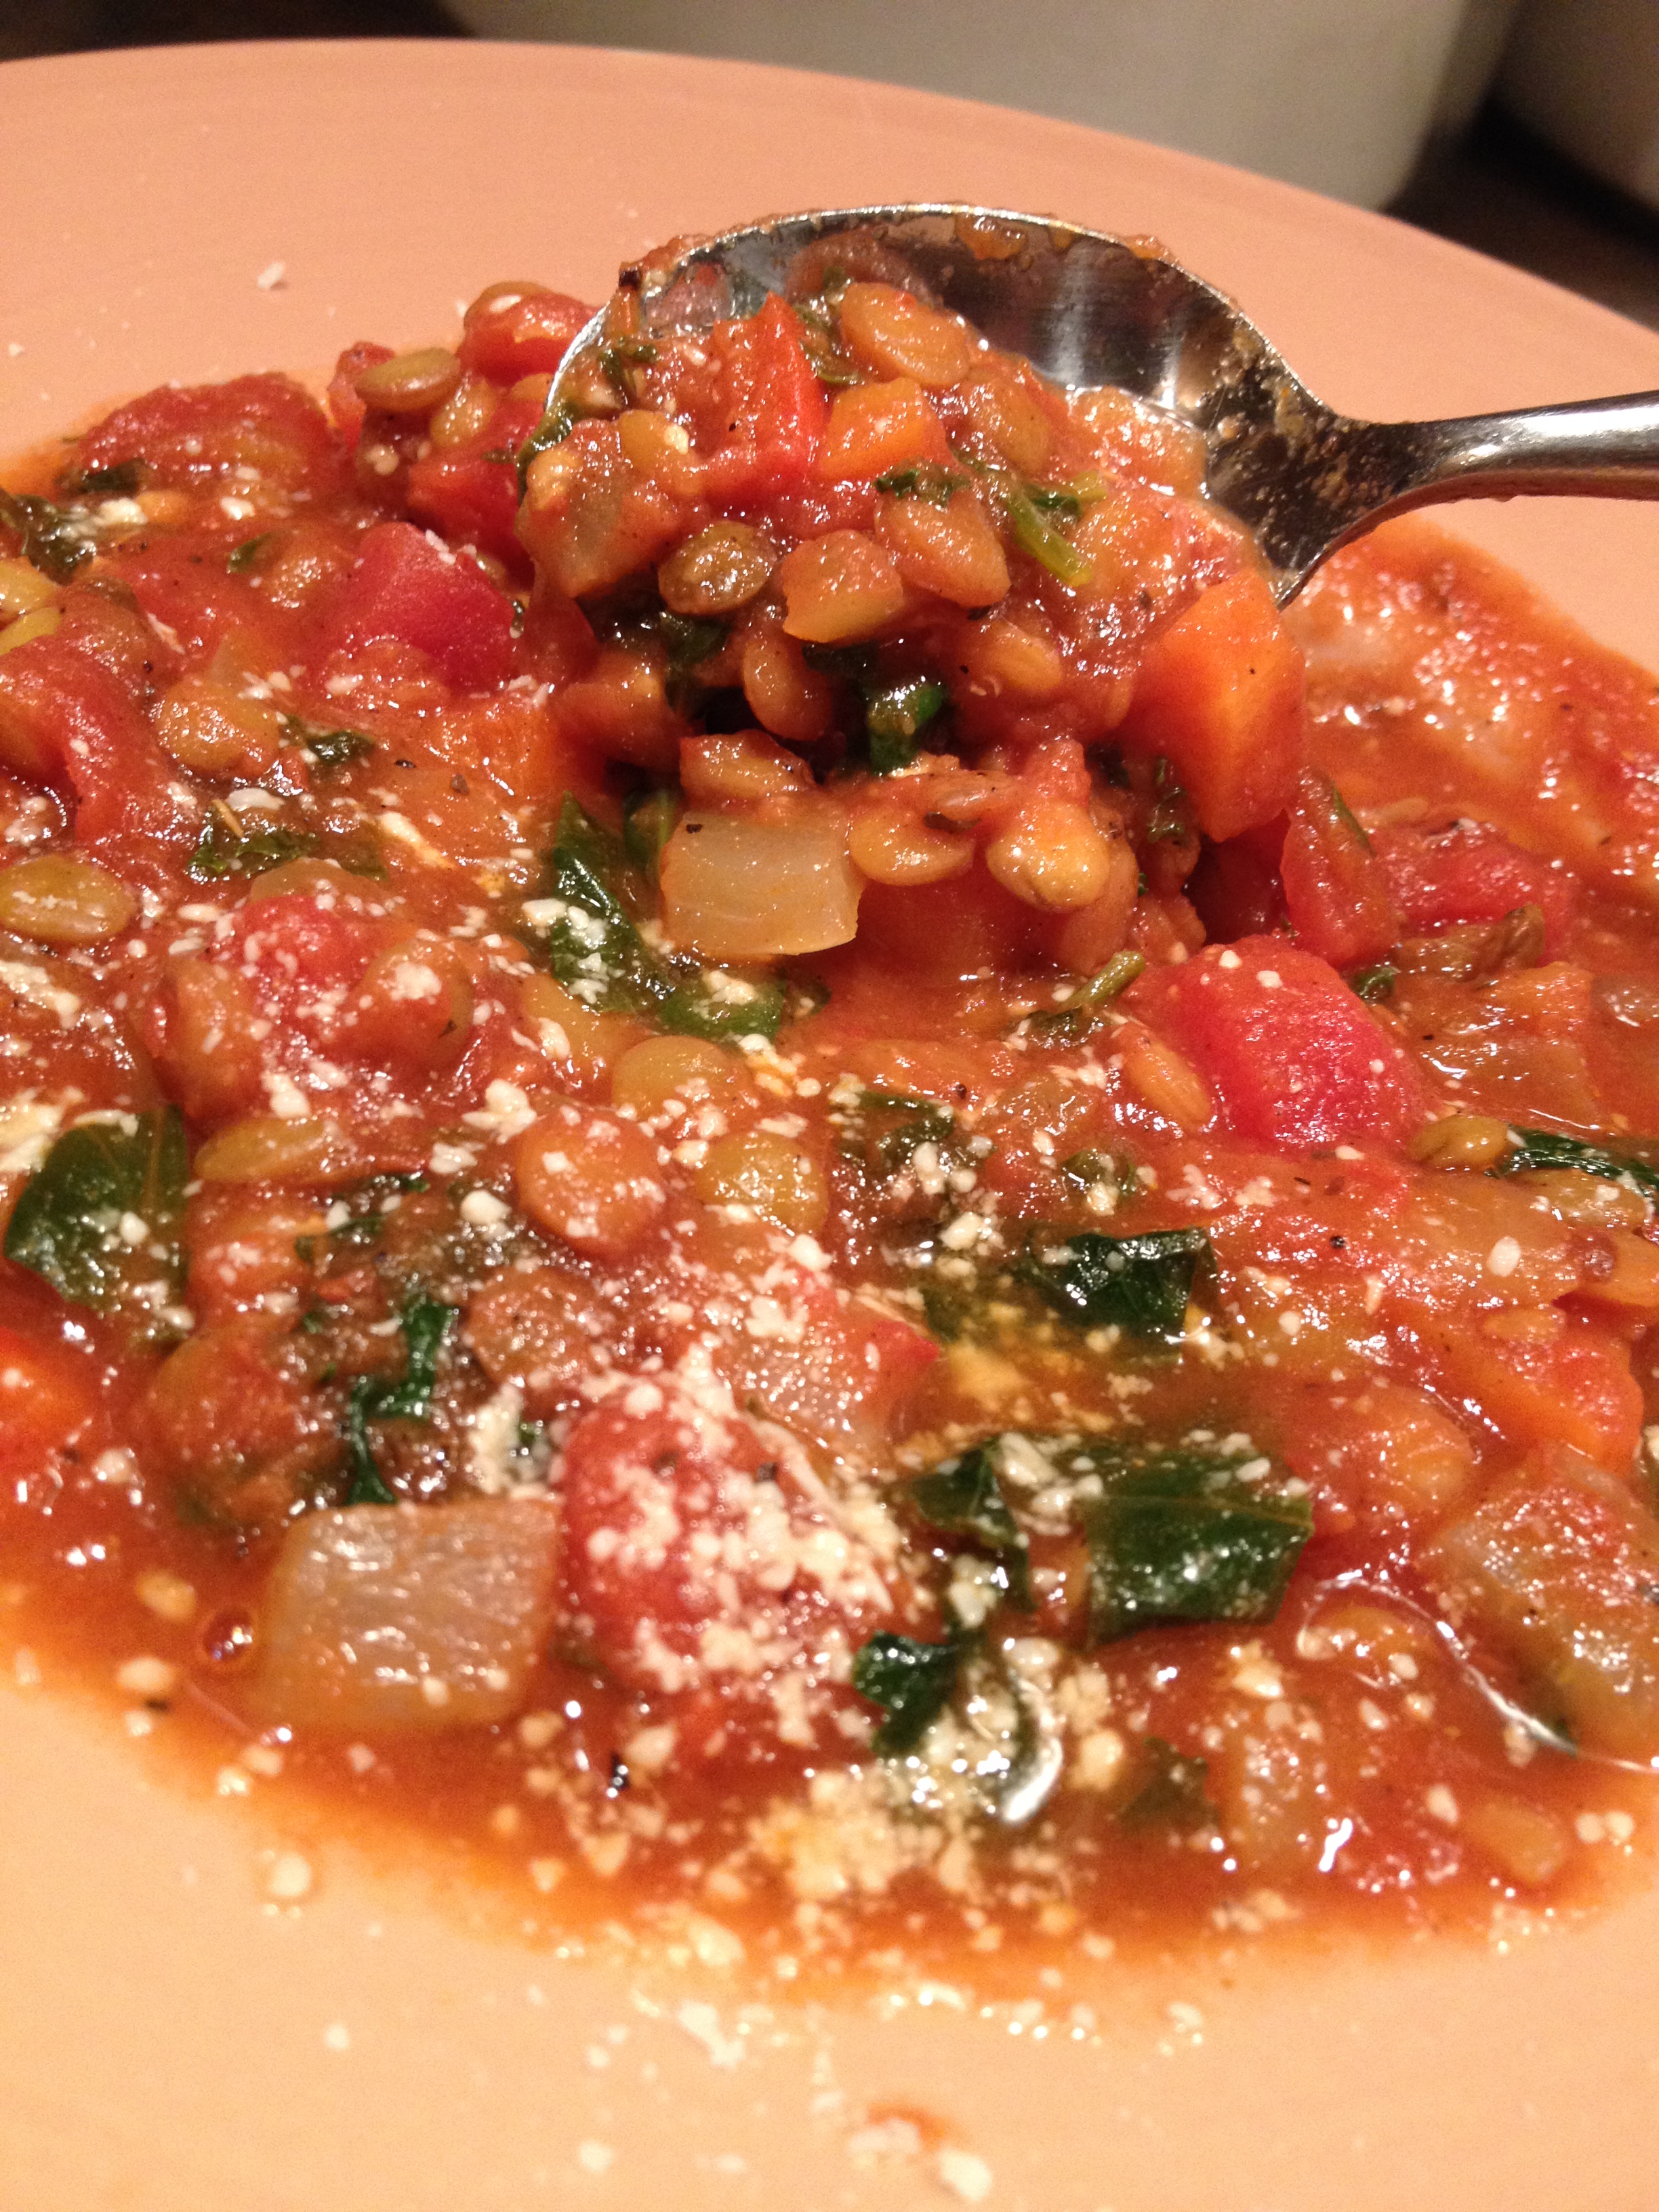
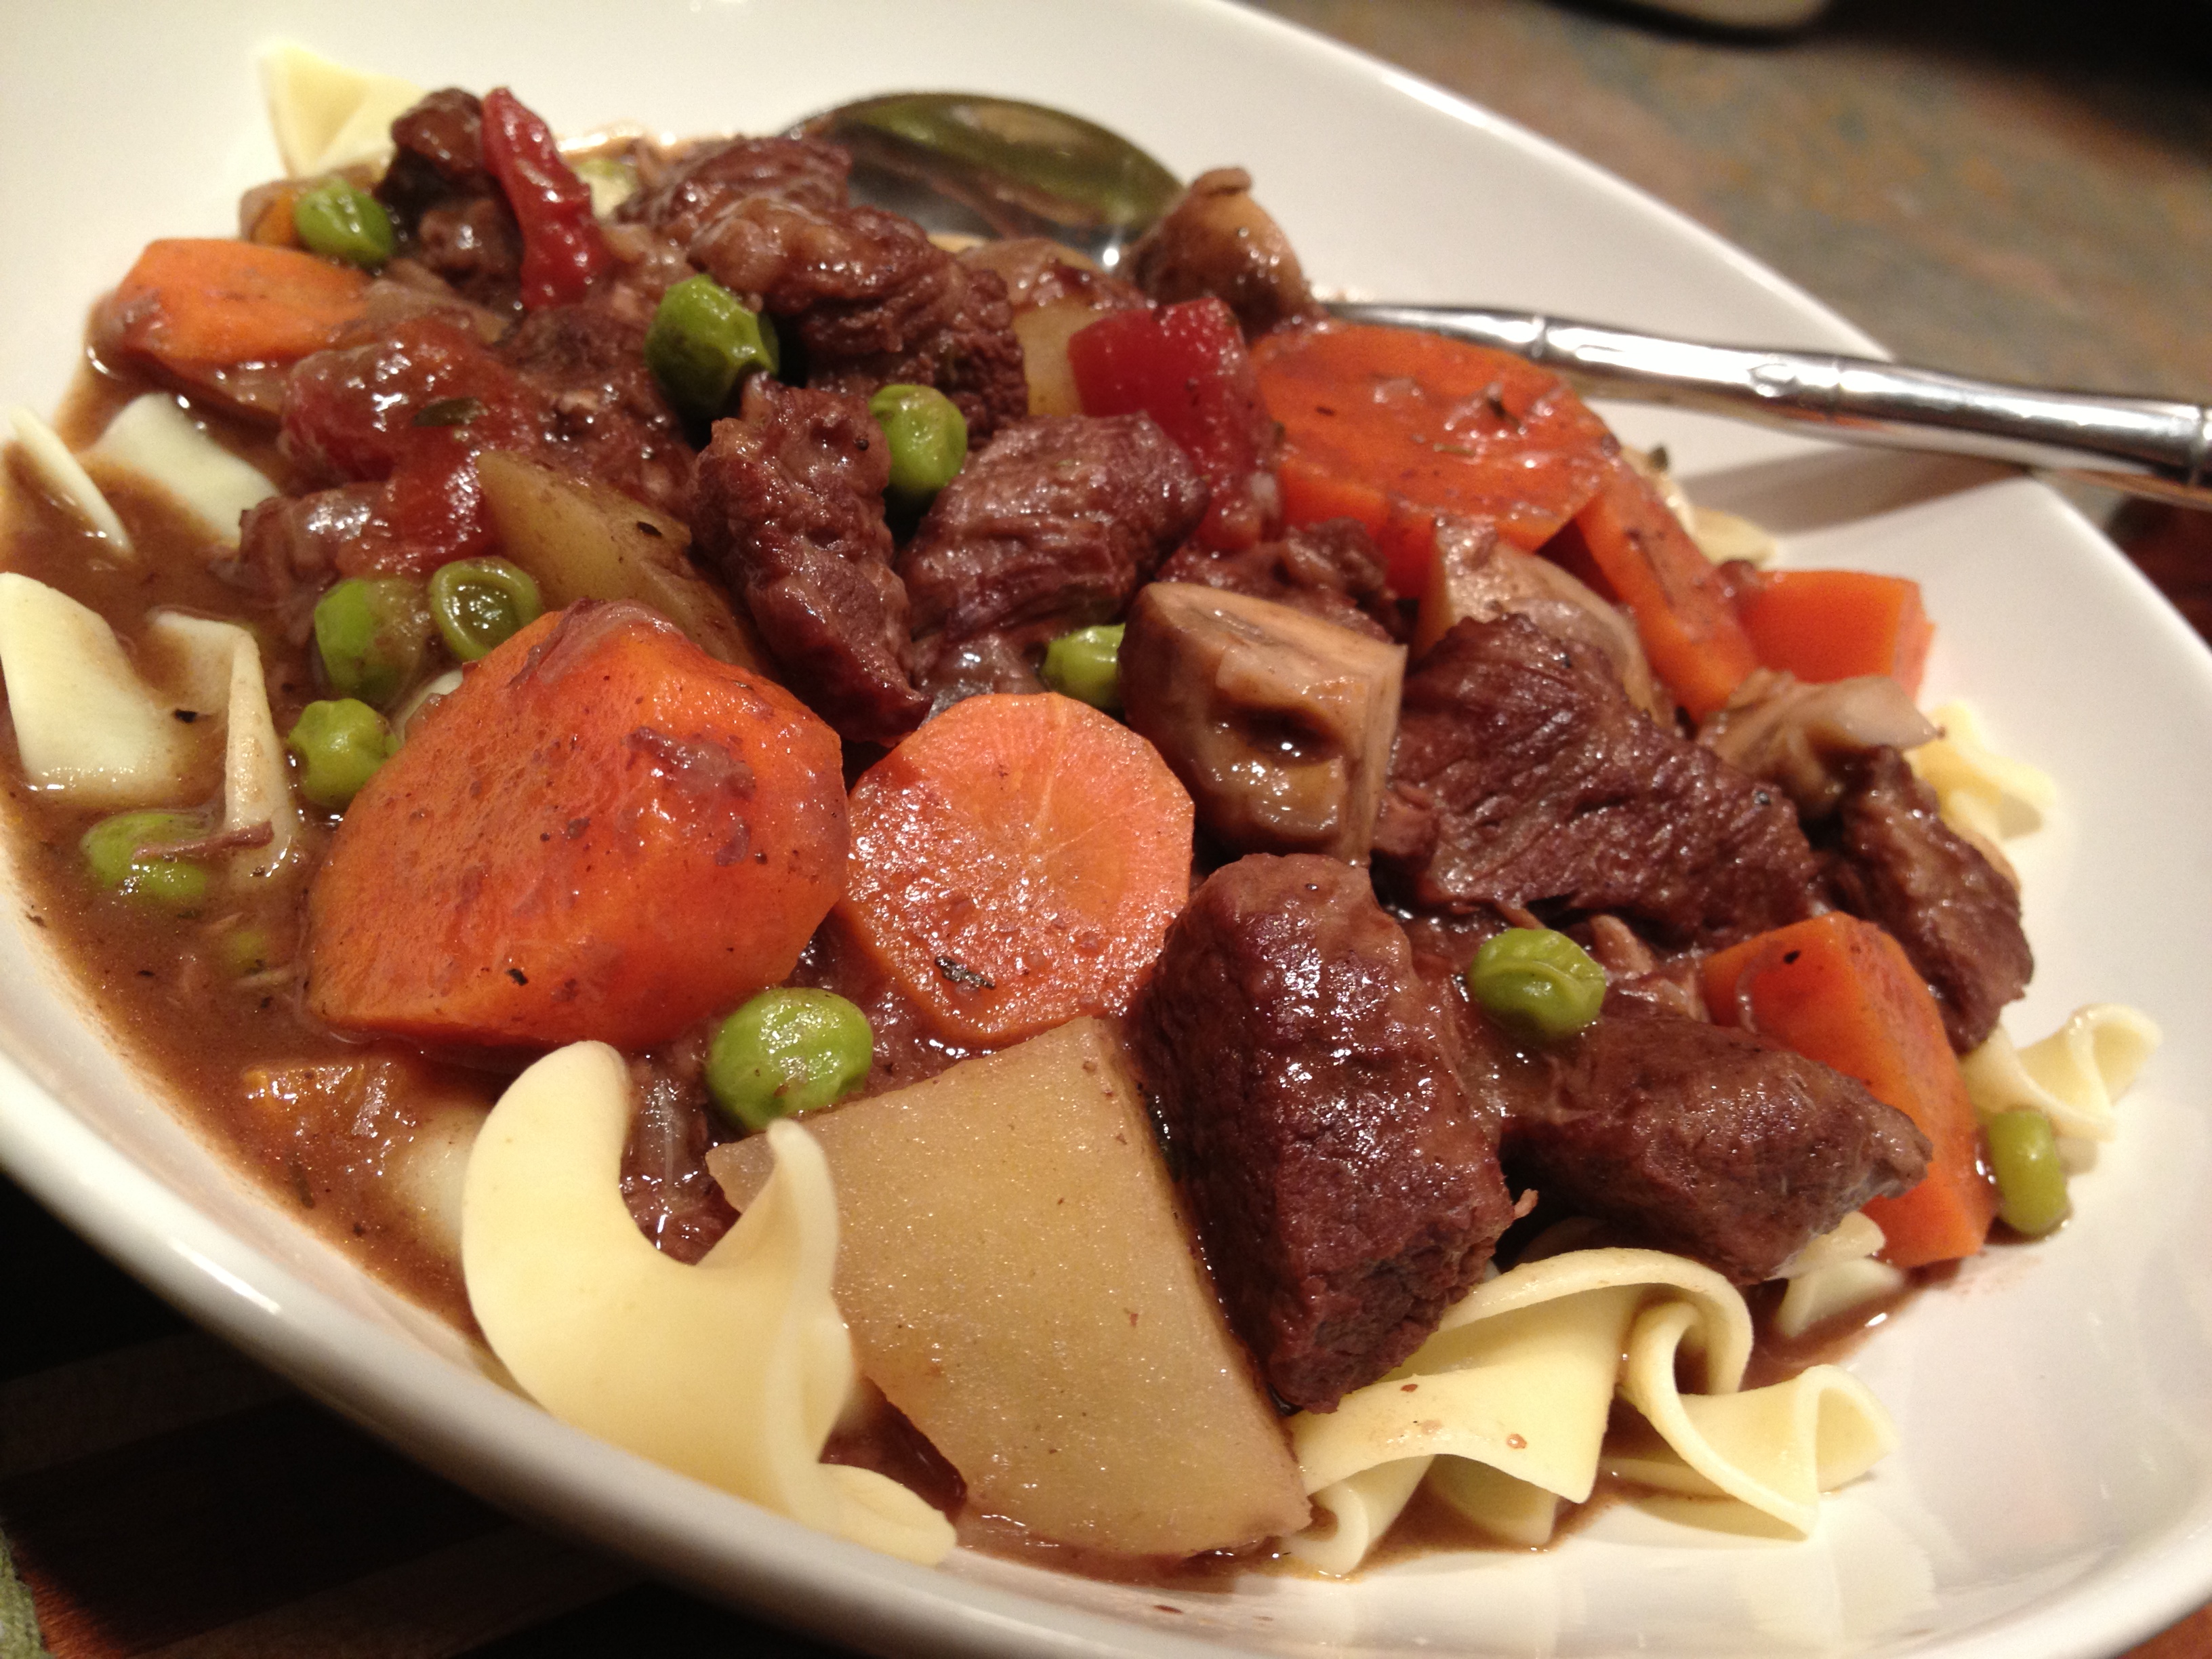
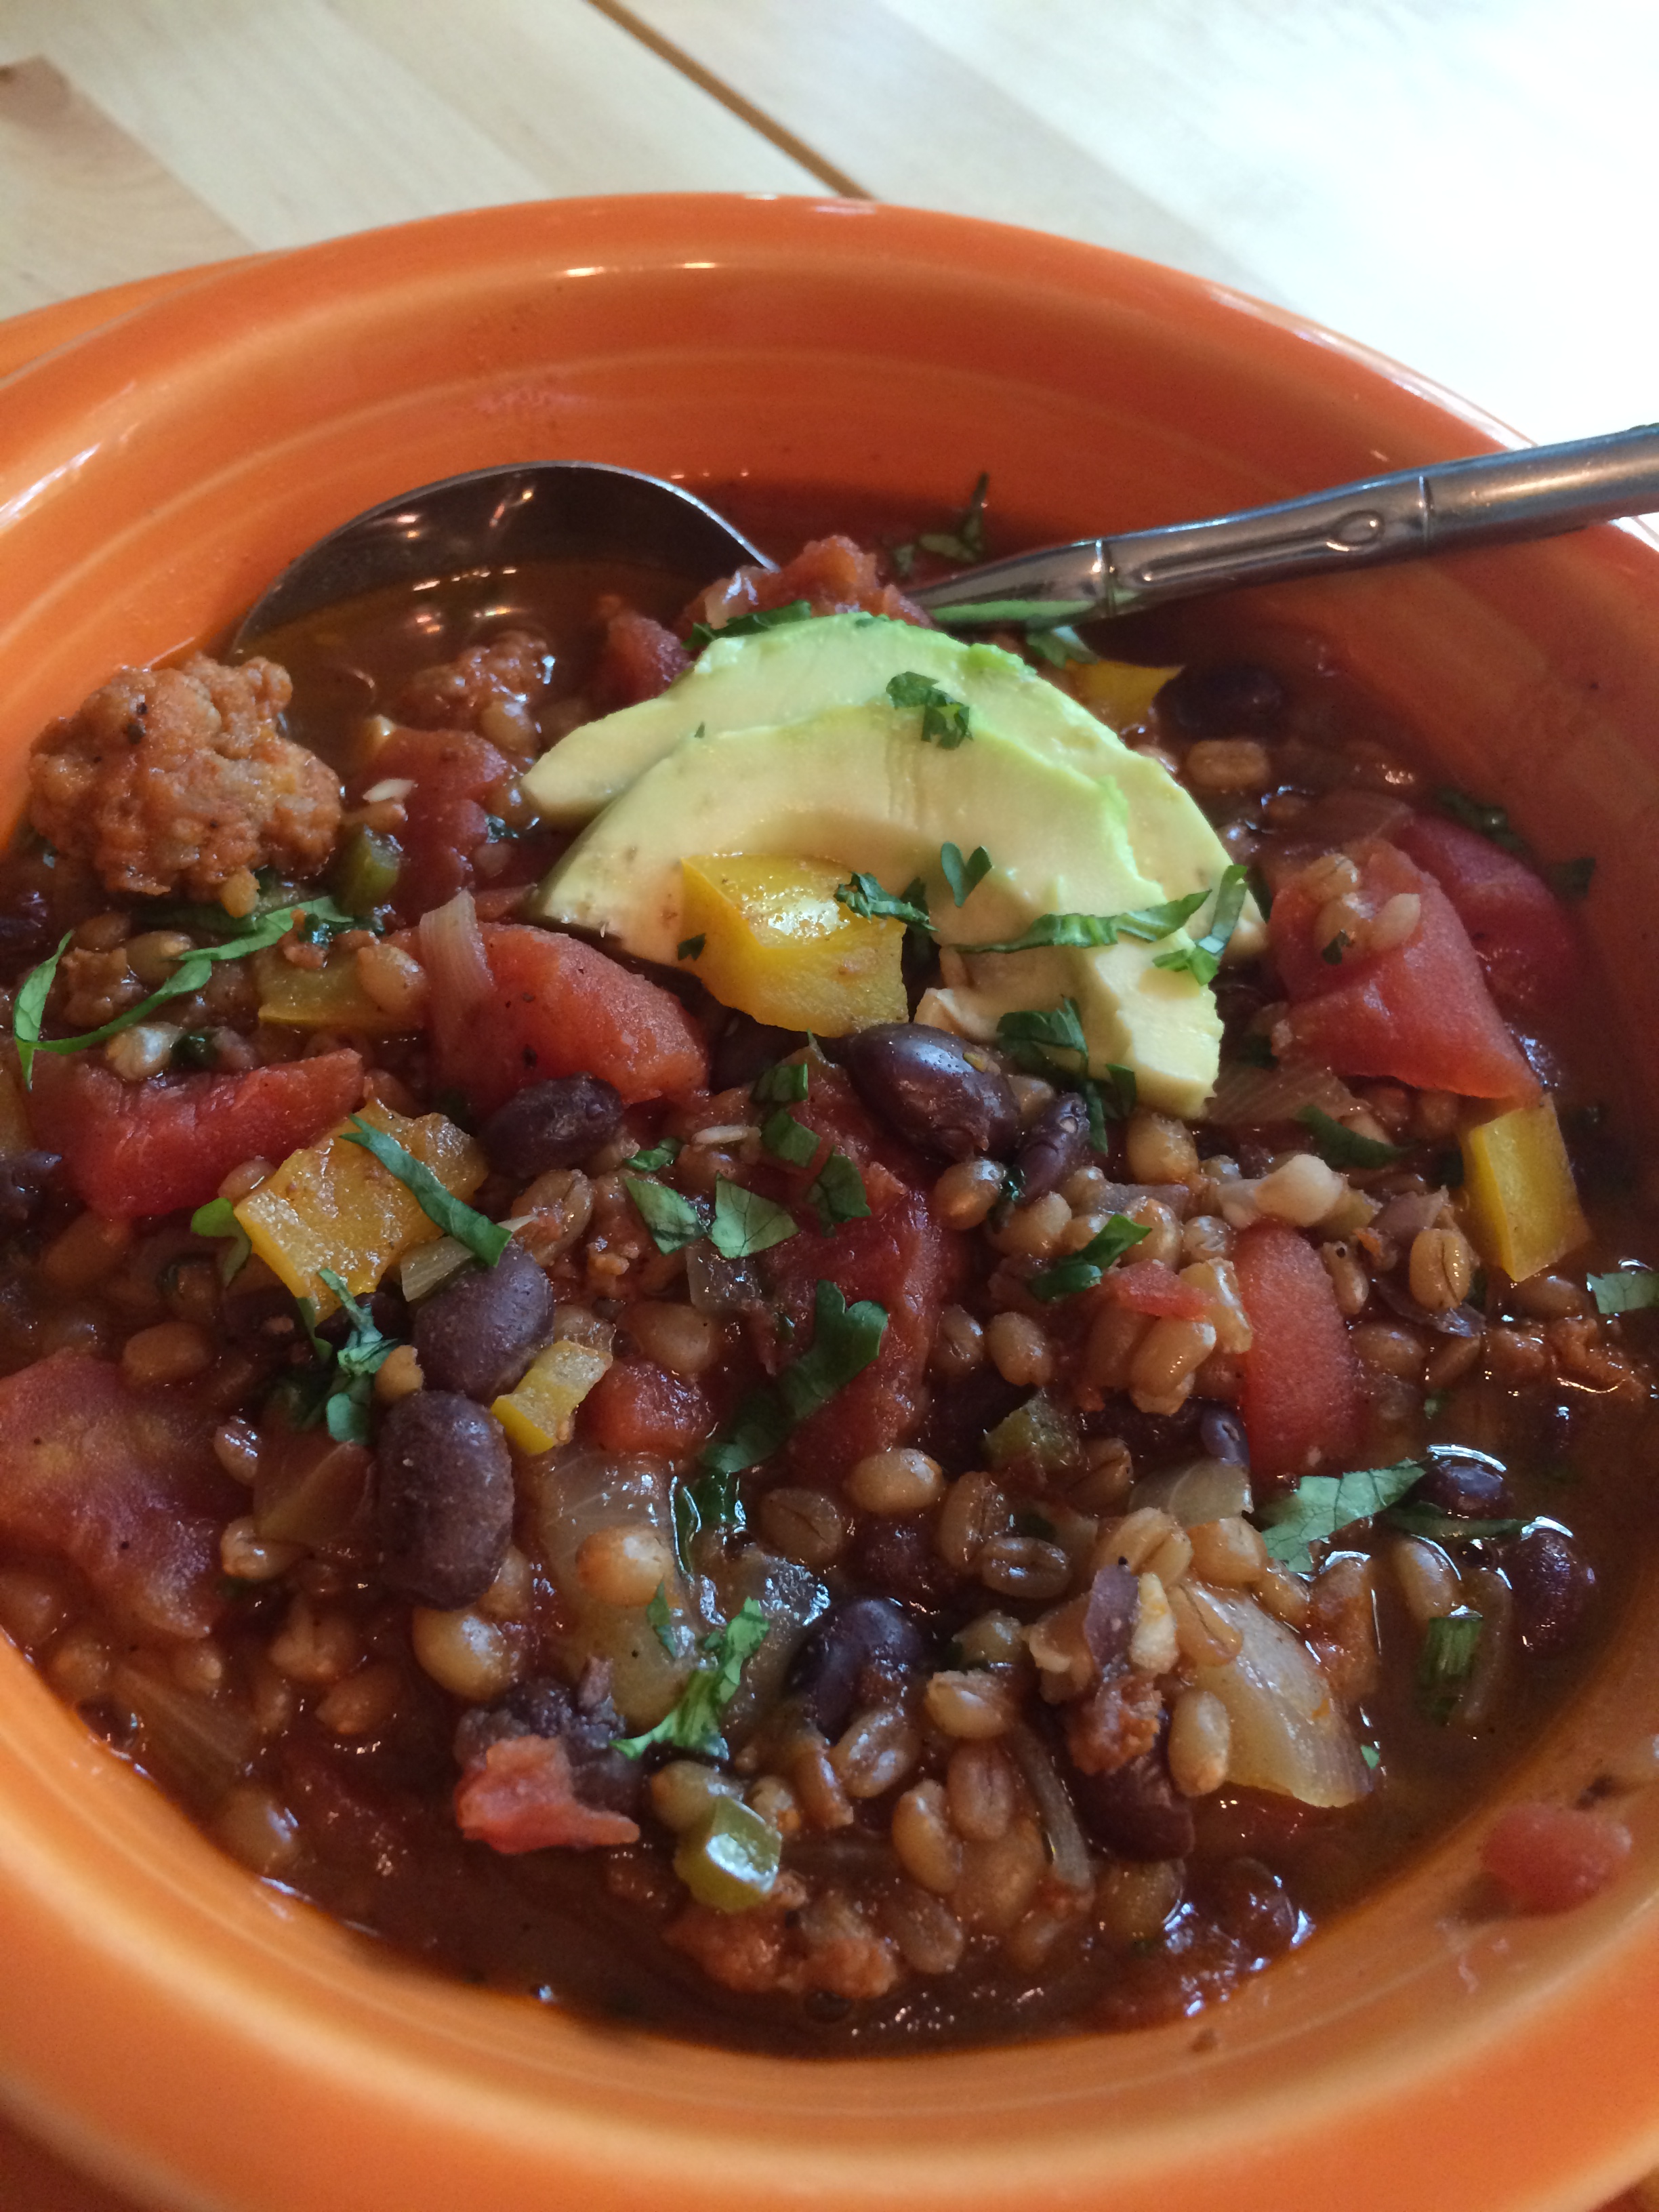
serve up a bowl and top with a few pieces of diced avocado (if you dig it) –  and get ready for a flavor explosion in your mouth!!  I love this recipe, and can’t wait to cook it up again soon.  multiple co-workers liked it, my mom liked it, and hubba-lish liked it too!!  winning!!   Enjoy!

peace and love yo!  spags.

zesty chili pic


the tomato pie experiment

109

last evening was delightful.   it surprises me that i jump in with that statement, given the fact that we are in the thick of two tots at home with a nasty  childhood virus known as Hand Foot and Mouth disease.   which… thankfully so far has been completely bearable.  neither child has been febrile, (aka- no fevers; sorry nurse in my coming out) and their spirits have been high and completely untarnished.  they are… simply put… contagious.  so at home with me they have remained over the past few days.  yesterday was a lovely sunny autumn day in Pittsburgh, so we took advantage and lassoed up the poodle to visit our local off leash dog park.  he ran his heart out, as always, and we had fun watching and breathing in some of the fresh end of summer air.  my dinner plans had been in mental motion from late morning, as i looked at five or so impeccably perfect garden ripe tomatoes, as well as a small bowlful of yellow round cherry tomatoes with excellent flavor.  i knew i loved my friend’s tomato pie, i mean really loved it, the last time i visited her for a girls weekend with some pals.  she is always cooking up something wholesome and fresh and seasonal each time we visit… and knocking our socks off, which is probably why we get along so well!  she has the most charming blog as well, called Simplify Wellness. give it a whirl if you are wellness minded like i am.  so yeah, tomato pie.  i knew i could do it.  i obtained some important tips from WFOHBH (wellness friend of hotbox hipster), like laying the tomato slices out on paper towels to let them sweat for a half hour.  i was shocked at how wet the towels were afterward!  i found a lovely recipe for a ‘healthy’ pie crust (i know, right?) that used extra virgin olive oil instead of butter. not that i don’t like LOVE butter, make no mistake… but i am always looking for nice alternatives along my cooking paths.  i located the recipe at a lovely little blog called Chocolate & Zucchini. this is the LINK for your enjoyment!

103

so the tots began preparing for a magic show they would put on for hubby and i later that evening, giving me plenty of ME time in the kitchen.  this pie was as simple as could be, layering tomatoes, freshly chopped basil, and cheeses…  but i wanted it to have another level of flavor.  ‘kick it up a notch’ if you will – in the words of wickedly talented Emeril.  how better to achieve that than with sauteed onions and garlic?  as the pan was heating for this task, i hit it with some olive oil, and then i sprinkled in a generous shake of red pepper flakes.

104

i ended up almost caramelizing the onions/garlic over low heat, and the result was fabulous.  OK let’s get on with this rodeo…

THE CRUST:

2 cups flour (whole wheat or all purpose or a mix of both)

1 tsp of salt

1/4 tsp of black pepper

1/4  tsp dried thyme

1 tsp of dried rosemary

couple pinches of dried basil and oregano as well

1/4 cup of olive oil (i used extra virgin, but any will do)

1/2 cup COLD water

add dry ingredients in a medium sized mixing bowl.  stir to combine.  add in your 1/4 c of olive oil. mix with a fork a bit to combine. (won’t all be combined, and will be course to large crumbles)  mix in the cold water with same fork until starting to come together. set your fork down, and get one hand in there, finishing the job until you can turn it out in one piece onto a floured counter.  roll it, adding a sprinkle of flour as necessary, until it looks like it will fit your pie plate.  add it to the plate, shape it, flute the edges if you want, and fork the bottom a bit.  throw it in the fridge for a half hour.  then remove from fridge and bake it at 400 degrees for 25 or 30 mins. remove from oven and let cool.  you could literally use this crust for anything you can think up from a yummy veggie pie with zucchini, tomatoes and asparagus with swiss cheese… or an onion and swiss chard with bacon breakfast creation… a chicken pot pie with fresh mushrooms…  i mean the possibilities are endless.

THE FILLING:

four ripe medium to large tomatoes / or other heirloom variations

half a large onion, thinly sliced

2-3 cloves of garlic, minced

mozzarella cheese slices

provolone cheese slices

shaved or grated Parmesan for the top

fresh basil leaves (about a half cup, chopped) – reserve some to sprinkle on top after baking.

WHAT YOU DO:

Prepare your pie crust as instructed above.  While it is cooling from baking, you can begin preparations for the filling.  Slice your tomatoes (medium thickness) and lay them out on some paper towels to sweat.  saute in olive oil (with some shakes of hot pepper flakes) your sliced onion…. after about four minutes, add the garlic and then turn heat to low.  let it go for a bit, until onions take on a nice light brown hue. remove from heat.   once your pie crust has cooled down, begin layering.  First do a layer of provolone. (i think this took four or five slices)  then do a layer of tomatoes.  salt and pepper that layer, and add the chopped basil atop. then a layer of mozzarella.  then the sauteed onions. then another layer of tomatoes.  i ended with a layer of mozzarella, and then i topped it off with a bunch of sliced yellow small tomatoes.

106

((i should add, that along the way, when i reached a cheese topped layer, i gave the whole thing a good firm pressing on with my hands.  ‘smoosh it down a bit, yo!’  ))  hit the top with some black pepper- and put it into a 375 degree oven for about 25 minutes or so.  remove from oven, sprinkle with fresh basil,  shave some Parmesan cheese over the top, and let it cool off a bit before cutting.  (like 15 mins or so)  Pour yourself a nice cold beer… or a glass of wine…  and get ready to eat one of the most surprisingly unique and shockingly delicious meals you’ve made in awhile!

110

we literally had to stop ourselves from eating this WHOLE PIE in one sitting… who ARE we??  no joke, it was THAT good.  I had a piece and a half… and I knew I wanted to enjoy it the next day… (if the nerd in me is being honest, seeing how it holds up for day 2 crossed my mind!)  tonight is the night- I am less than an hour from leftover heaven on a plate…  and since I have no cooking to do, these summer wheat beers I’ve had stashed away are tasting even sweeter right now as I wrap up!  how will you close out your last week of summer???  make this pie dude.  do it.

peace and love yo.

watching it disappear!

112


Juicing… living the good life.

020

we all want to do the best we can to ensure good health; not only for the present moment, but for the long haul down the road of life.  sometimes doing the right thing is a challenge, and I get that. sometimes with all of the hats we are donning and doffing… grabbing a healthy breakfast or lunch becomes an afterthought.  you find yourself grabbing a quickie packaged something or other from the cupboard and mindlessly consuming it at red lights on your way in to the office.  I am here to tell you that you deserve better. your body deserves better.  and it’s as easy as bulking up on your produce purchases and allowing yourself 15 extra minutes in the morning, a few days per week.  I am talking about JUICING.  I know, I know…. juicing seems to fall under one of those, “oh it looks wonderful, but who has time for it” or  “I’d probably buy the juicer and never use it” …and I’m here to body slam those negative thoughts.  I bought a juicer on Craigslist for 60 bucks. Rewind… first I BORROWED a juicer from a doctor pal of mine, and test drove it for a couple of months.  I was smitten.  then, when she asked for it back, I felt as if I’d lost a friend! (the juicer) -and I knew I had to have one of my own.  enter craigslist… and the very next day I was juicing once again.  the great thing about juicing, is that you can easily consume things that you would NEVER be consuming in their whole form at one sitting… unless you are a big fat bunny rabbit.  see visual below….

vegetable forward
vegetable forward

but somehow, when you put it all together, balancing the veggies with a nice tart apple and a chunk of citrus fruit… it tastes amazing!! keeping in mind, more often than not, the color is less than desirable. my hubby equates it to pond water at times.  However, that being said, if you throw a beet in the mix… prepare to drink, hands down, the most beautifully vivid liquid you will ever touch to your lips!! I was blown away by the bright bold hue of pure beet juice. not the purple watery liquid you strain from the can that inevitably stains your cutting board and counter… but PURE beet juice created from squeezing it mechanically.  ((see below))

one raw beet will do it.

I shared this blend with my seven year old daughter, who loved that it gave her a PINK moustache!  juice up fruits that are about to go bad, combine them with things that are wicked good for you, but that you may not want to consume on their own in their raw form… example, beets, kale, spinach, rhubarb, raw ginger, a big rip of parsley, the nice thing about juicing is that you can use the stems and all… I like to save the core of the pineapple, adding that into a mix for my sweetness one day, hence wasting less, and getting more from the pineapple than I did before! I also like knowing that the variety of items you see on my cutting board below will transform into a liquid that will supply me with over half of the vitamins and antioxidants I will need for the whole day!  literally, after I drink my JUICED breakfast from my mason jar in the morning, about a half hour later I feel like I could take on the world! the energy is SO PURE and SO FAST… you won’t even think about eating again until lunch time. juice your mix, and place in a mason jar with lid secured. stash in your work bag. when you arrive at work, give it a shake and sip away (or gulp like me) for good health!!  you just gave yourself a breakfast like no other.  I call it Rockstar food.   OK time for another pic.

one of my favorite mixes.

OK so let’s talk health benefits. oh and before I do that… you will have the critics who will say, YES but you are missing out on all the fiber by juicing!!  -and to them I reply… take the back carriage off of your machine, and whisk in a few tablespoons of the lovely pulp to your beverage! VOILA! there you go.  this pulp helps make an AMAZING COMPOST by the way.  waste not.  so for starters, there are the vitamins. A,D,K,C, all of the B’s, chlorophyll, (linked an amazing little article there for ya’ll) enzymes, phytonutrients (help us fight off disease), and the list goes on and on. the take away point here is that you are feeding your body, your cells, your ‘machine’… LIVE FOODS… foods that nature created, and that your body knows EXACTLY what to do with!  –and your body knowing exactly what do with these foods, is the EXACT energy boost that you are FEELING almost immediately after drinking these juices!!  we stress our bodies to the max these days, not only physical stress and lack of sleep and sometimes lack of activity, but mental stress as well.  money troubles alone are enough to wreak havoc on our sense of well being and our overall body health. stress ends up breaking down and deteriorating our cells, thus causing (or opening us up to) degenerative disorders.  this is one small way that you can fight back and do something great for your body. for your health and well being.  I can GUARANTEE that not a one of you, after juicing for a couple of days, will utter the words- “man I wish I wouldn’t have drank that”, or “boy I sure feel lousy now”…. WON’T HAPPEN.  but did you ever feel that way after eating a big donut or two?? uh-huh.  how about after eating a pop tart and a diet soda? you’re feeling me.  those food are offering you nothing, yet we waste money on them and worse yet, consume them.  I challenge each reader to take ownership of your body. become accountable, and watch how your life changes.  show up each day.  think about what you are putting in your mouth and what it has to offer you. I am not saying you should deprive yourself of things you enjoy eating… treat yourself well.  I eat a frozen snicker bar next to the pool in the summer sun probably twice a week! -and I don’t think twice about it.  you know why?? because when you make healthy decisions a majority of the time, you’re allotted those freedoms!  it’s a give and take, and the old adage, everything in moderation is key.  but JUICING…. you’re gonna like it.

peace and love yo.


my journey into fermentation…

012

035

so yeah… Kombucha tea.  it’s happening.  it’s been happening for months.  i am in the thick of it.  i’ve shared one SCOBY already, and i’m ready to gift my second upon completion of this batch.  i have ARRIVED, i suppose you could declare, as far as the Kombucha brewing crowd is concerned.  what IS Kombucha you ask???  it is a fermented tea, helped along by something called a SCOBY.  which stands for symbiotic culture of bacteria and yeast.  it begins as a batch of plain and simple tea… with a cup of sugar added… brewed under near sterile technique… but that, my friend, is the boring part.  the real magic happens when the SCOBY is added to the jar with a cup or two of the starter liquid, and it is left unattended in a dark and lonely space for 7-10 days or so.  when you bring that lovely and hard working jar out into the light of your kitchen, and you note the bubbles around the scoby- and you remove your paper towel and rubber band…. VOILA! you see that your scoby has grown, seemingly doubled… from living and breathing and working with your sugar and caffeine in the tea.  it is ‘foodie science’ at it’s finest people.   set aside the probiotics and other health benefits you are about to experience, although these are huge… i am addicted to the TASTE of this stuff.  it has the most lovely balance of sour and sweet, and it’s FIZZY!!  how did all of this happen from plain tea??  you feel like you are a part of a science class, and you just aced your class project.  if you are any part nerd, like i am, you are gonna dig this whole scene… trust me.   enter then more coolness… the ability to do a second ferment- adding some juice or dried fruits to your cleaned (boiled if glass) bottles, adding tea up to the neck, capping, and allowing them to sit out at room temp (in same dark space) for three more days.  this builds carbonation, naturally, and gives it the fizziness as well as allowing it to feed a bit on whatever fruit or juice you have added.  the first time i brewed, i added some dried cherries to one or two bottles, a few slices of dried mango to another, and some “just blueberry” juice to the others.  just make sure your juice is 100% juice without additives- and of a high quality.  when i started out doing this, i used cleaned and sanitzed small coke bottles so that i could squeeze them a couple of days into the second ferment… if they were stiff- i knew there was carbonation happening.  warning: do not neglect or forget about these bottles, they can explode. unlike soda, which does not continue to carbonate as it sits… these WILL.  they are living and working cultured drinks.  putting them in the fridge nearly stops the fermentation process, and they can be stored and enjoyed for up to a month.  the recommendation is to start out slowly in your Kombucha consumption.  4 oz. a day is a good rule of thumb.  also, drink PLENTY  of water after enjoying.  although kombucha has a sweet taste, keep in mind that it IS an acidic beverage, and consuming too much can wreak havoc on your system, throw off your acid/base balance and literally make you sick. as with everything in life, too much of even a good thing, is… well… too much.   after a week or so of adjusting and comforting your body to the presence of the Kombucha, you may find a morning and night routine to be appealing.  i find that when i consume a few ounces of this before bed at night- it aids greatly in digestion and does it’s best work while you sleep- at a time when you’re not adding anything else to your tummy.  just my two cents… but it works well i find.  you will read these things about kombucha as you leave my blog and do some homework:  it is low in calories and sugar, it may or may not contain trace amounts (1% or less) of alcohol as a by product of the short fermentation process.  it is full of probiotics and antioxidants, which our intestines love. It  can boost overall health, aid in anxiety and depression,  heart burn, arthritis, improve your skin and nails and the list goes on.  pretty amazing stuff actually.  no wonder it has been consumed for centuries in ancient China and touted “the elixir of life.”   enzymes boost metabolism.  this is a proven fact.  so you do the math.  although you may actually see a one or two pound weight GAIN when you start on this, it is simply due to it causing your gut to function WAY more efficiently.  for a short time, i know, TMI… i saw a decrease in output for a few days… maybe i wasn’t drinking enough water, who knows… but shortly there after, i was on the regularity train, and how!!   Kombucha tea costs anywhere from 2 – 7 dollars a bottle when you buy it at health food stores, no joke. it’s not cheap.  when you brew your own… we’re talking pennies a bottle when it’s all said and done.  if you don’t have filtered water (either on your tap or a Brita in the fridge) it is recommended to use distilled water.  i buy a gallon of it each time i brew. just to be safe. the last thing i want to do is mess up my scoby. lol.  i look at that thing as my mother ship to all future brews… well, because it IS!  i have decided to NOT advise you how to brew Kombucha on this blog… simply because it is a lot of typing, a lot of steps, and i would feel AWFUL if i missed an important step and it didn’t work out for you.  google it. you will have fun clicking from site to site- learning as you go. take notes. heck, start a little journal, jot down notes with each brew and then add notes about taste and whatever you encounter with your body as well.  again… there’s the nerd in me coming out.  i found some useful info on the wholeliving.com  site, as well as thekitchn.com .  there is kombucha eric- who is a high energy dude with oodles of good info for you surrounding kombucha.  he is one of the founders of kombucha brooklyn.  you can order scobys from them, starter kits, flip top bottles, etc.   but most sites you will visit will link you to places and hook ups for starter kits.  anyway, yeah… Kombucha… i’m loving it.  enjoy!!

039

040 008

036 006


Italian Lentil Stew… Zuppa di Lenticchie!

all natural... guilt free... bursting with flavor
all natural… guilt free… bursting with flavor

Magnesium is Nature’s own calcium channel blocker. When enough magnesium is around, veins and arteries breathe a sigh of relief and relax… Want to literally keep your heart happy? Eat lentils.” – whfoods.com

about a month or so ago, I decided to cook with lentils for the first time ever.   i am heavy with regret that i waited so long.  why? because they are a nutritional powerhouse in a tiny adorable package… that’s why.  Health magazine touted them as one of the five healthiest foods we can eat.  they are one of the highest protein rich legumes out there… packing a whopping 26g of protein.   they are fiber rich, thus cholesterol reducing, and brilliant for weight loss, given their low fat and high fiber content.  they pack iron, B vitamins, zinc (cold season BFF) and an outstanding 120% of Folate!  so yeah, i fell for lentils.  it was a beautiful thing, and I believe I picked the absolute perfect dish in which to begin this life-long relationship… an Italian lentil soupy stew.   i decided what I wanted to be in the stew… thought about how I should bring it all together… and fast forward spoon to mouth, the bright – bold flavors blew me away!   this pot of yumminess will last you several days, and feed you (and a willing friend) lunch and dinner (and heck even breakfast one lazy Sunday if we’re being honest) for all of said days.  this recipe warms you in the fall and winter, and is bright and refreshing enough to eat in spring and summer as well while enjoying a book on the patio!  The flavors marry, and it truly keeps getting better.  it can even be served atop scrambled eggs with some crunchy baked pita wedges to help get every last bit to your mouth.  the fat content on this is next to nothing… only coming from the little bit of olive oil you  begin with.  so eating a bowl late at night while catching up on your favorite TV is definitely not out of the question.  that is, as long as you have a steel stomach and will not be up half of the night with heartburn!! you were warned.  ok lets get on with it…  this dish comes together in about 20 minutes with all of the chopping and can opening- and it cooks for 30 minutes.   it is a one pot meal- aka all cooking done in same pot.

WHAT YOU NEED:

large onion (diced)

3-4 carrots (small dice)

half of a red bell pepper (or orange or yellow- NOT green)

3 cloves of garlic- peeled and minced

2 T olive oil (maybe more- go with it)

2 tsp. chili powder

1/2 tsp. oregano

1/4 tsp. paprika

1 tsp. cumin

1 bay leaf

1/2 tsp. coriander (if this is the only thing stopping you from making this dish if you don’t have it- leave it out!! it will be fine!

1 tsp salt

1/2 tsp. black pepper

large handful of baby spinach (maybe a cup packed) – roughly chop

2 cans chicken broth (sub vegetable broth for vegan version!!)

1 cup of water

28 oz. can diced tomatoes

28 oz. can crushed tomatoes

1 cup of lentils (i used greenish brown regular lentils)- soak them in warm water while you prep and then rinse well prior to adding.

a splash of lemon juice and a small handful of chopped fresh flat leaf parsley stirred in at the end really brings this to life… but don’t beat yourself up if you don’t have either. it is SPOT on without. 🙂

HERE’S WHAT YOU DO:

add some olive oil to a dutch oven.  prepare your vegetables as outlined above, and open your cans so you are ready to move forward. get your lentils soaking in a dish in warm water.  turn on your pot and heat the olive oil over high heat. add your onions, carrots and bell pepper. saute over med/high heat for five minutes or so- stirring often- add garlic near end and cook a minute longer. onions should begin to soften and turn a slightly brownish color.  add your dried spices and saute a minute longer.   at this point you can add your tomatoes, broth, water and bay leaf.  drain and rinse your lentils a bit, and add them into the mix.  bring mixture back up to a boil- and then cover- leaving a small gap in the lid. reduce heat to medium low- and set timer for 30 mins. stir  ONCE during cooking.  after 30 mins- remove lid and stir in your spinach.  (plus parsley and lemon squeeze if you are going that route.)  at this point it is done and can be served up in a nice shallow bowl.  i like to let it sit, uncovered on the stove for another 10 mins or so- off the heat – just to let it rest after all of that hard work.   sprinkle your serving with some parmesan cheese and serve with a nice piece of fresh garlic bread for over the top enjoyment.  also good with some simple crackers alongside- or straight up with nothing at all.  store in fridge (in the pot if you wish) for up to four days.  Enjoy!

002

026


Creamy dreamy chicken comfort casserole

quick, easy and delicious!!

This January in Pittsburgh as temps are ping ponging between 28*F and -10*F on a weekly basis, i find myself more than ever longing for comfort foods.  Stews that simmer for hours on end… filling the house with delightful aromas,  homemade breads rising in front of the fire… ready to mop up red sauces later that evening, and ultra thick, creamy flavorful sauces like the one above… ready to cling to whatever pasta you pair it with.  Our activities are limited in weather like this.  Where we would normally linger outside in the yard with the dog, maybe tossing a tennis ball or two, we find ourselves hovering inside the door wishing he/she would hurry up and do their business already.  Where we would normally be bundling up the children and sending them out for sledding and snowball fights, we find ourselves considering the risk of frostbite and keeping them inside instead.   I myself love to run, and try to get out at least a couple of times per week to log some miles… but this weather… it’s abrasive to say the least.   Our kitchens are the comfort hubs in the winter months.  The oven is warm, the hot cocoa supply is endless, our pantries are stocked and families everywhere are baking batches of warm cookies on a whim… just for “something to do.”  The recipe i’m about to arm you with comes together in less than a half hour- and warms in the oven a bit afterward while you get everyone ready for dinner … turn off the TV… turn on some relaxing music… enjoy a nice glass of wine and sit down and ‘be together’ with your family.  “become present” and enjoy the food.  Here we go.

what you need:

1 can cream of chicken soup

1 can cream of celery soup

1 8oz container of sour cream

1 bag of frozen ‘cook in the bag’ broccoli florets

1 stalk of celery (and some of the leaves if you have them)

half an onion (if large) -whole if smaller

skim milk

box of pasta (penne or farfalle or cavatappi- whatever you like)

cooked rotisserie chicken from your local store (just for ease)

salt/pepper

what you do:

start a pot of water boiling – and cook pasta according to package directions.  drain, rinse and set aside once it’s done.  cook your broccoli in the microwave per package instructions. set aside once it’s done.  in the mean time, if you are using a rotisserie chicken, slice up the breast meat- and cut into small pieces. set aside.  dice your onion and celery (and leaves if you have some) and set aside. in a large non stick pan (i like to use a wok for this to be honest)- add a bit of olive oil or butter- and saute your onion/celery until tender- maybe five minutes or so. Add your 2 cans of soup and a half a can of milk. stir well to combine.  see visual below.

the base... bring it up to temp
the base… bring it up to temp

bring this up to bubbling over medium heat, stirring occasionally. Add pepper (maybe a half a tsp) and stir. pinch of salt- the soups are already salty though.  Stir and then add your sour cream, your cooked broccoli and your chicken. stir to combine.  see visual below.

bringing it all together

bring back up to bubbling over a medium heat. turn off heat and add your cooked pasta right in… stirring to coat nicely.   Take and grease a large lasagna pan with olive oil (or any oil)- and preheat your oven to 350*.  Add this pasta right into your dish (careful- the pan will be heavy) and top with a bit of shredded cheese of your choosing. i chose a shredded cheddar jack-  you don’t need much- maybe a cup- but if your family loves cheese… then go at it with two cups.  🙂  Bake at 350 for 25-30 minutes uncovered.  i neglected to take a finished plated pic of this last night… probably because i could not wait to get this into my mouth!! it was super duper delicious, creamy and satisfying in every way.  Anyone can tackle this recipe.  honest.  Enjoy… and for goodness sakes, KEEP WARM!!

Homemade Beef Stroganoff

satiety at its finest!

so on a random thursday morning last week, i developed a ‘hankerin’ for some Beef Stroganoff.  likely fueled by our crazy Pittsburgh weather that has been up and down more than Richard Simmons in a step aerobics class.   i longed for something rich, something creamy… and unmistakingly homemade.  i had a 2.5 pound beef round sirloin tip roast to work with.  they were BOGO at the grocer a couple weeks prior- and i knew would be perfect for a number of recipes.   i did beef stew not long ago… although good- not rich enough to satisfy my craving.  goulash is always good and spicy… but again, i was looking to be sated by this meal.  i thought a bit more.  suddenly visions of a rich, thick, oniony sour cream sauce with tender strips of beef over egg noodles seeped into my foodie mind.  i punched my fist into the air in a most victorious motion…. shouting STROGANOFF!!  but wait… i’d never made it before!! would it be difficult?? what is IN it that makes that sauce so creamy and divine?  i planned on taking some help from a McCormick packet- but after reading the back of it- i realized it was really just dried herbs and dried milk and cornstarch and the like.  i got this.  i can do this.  think Spags… think.  i envisioned the whole process from how i would get the beef to be fall apart fork tender… to starting the thickening process for the sauce and lastly on to the flavors i wanted to incorporate.   also taking into account having to bang out a three hour nursing shift i picked up at the University that afternoon from 12-3 (with forty minute commutes bookending it).  OK, no worries… we can do this.  i decided to get to work right away, cutting, flouring and browning my beef at 930 in the morning.  i would take some help from the crock pot- adding the browned beef to it- and adding in a can of french onion soup, a cup and a half of water, one large vidalia onion (chopped) and six fresh sprigs of thyme right on top. lid on, cooked it for eight hours on low.  that way, at five when i’m getting down and dirty with this dish and making the magic happen… my meat will be ready and waiting.  fast forward eight hours- it’s showtime. i poured myself a cuba libre, set the Pandora to Neko Case, and pulled up my sleeves.  get a pot of water boiling for your egg noodles. cook per package directions.  take a sturdy bowl and place it in a clean sink. take a big colander and place atop said bowl. CAREFULLY pour your crock pot contents into the strainer. let it sit and strain into the bowl, helping the process by pushing down here and there with the back of a spatula. set these aside for five minutes in a safe place.  in a large non stick skillet or shallow sauce pan, melt a pat of butter and saute some sliced crimini or white mushrooms (about seven or eight of them) until tender. remove them to a small bowl and set aside.  in the same pan, melt a half stick of butter. to this add a quarter cup of flour and immediately stir (over medium heat) to make a rue. it should be thick- almost like playdough. add another T of flour if you need, to reach this consistency.  quickly pour in a cup of milk. (i used 1% but any will do) and the juice from your crockpot straining procedure. whisk or stir with wooden spoon to combine.  add a tsp of salt- and a half tsp of black pepper. stir.  this is the point where you have to use your judgement. if this looks way too thick to you, add a half cup of water and stir some more. if needs to thin a smidge more, add a quarter cup of water.  see pic below for a visual.

064

i think i maybe added one more quarter cup of water at this point- and then it was perfect.   Add your sauteed mushrooms.  Stir in a whole 8 oz. container of sour cream and stir in to combine. (still working over medium heat here)  Then add all of your beef and onions and loveliness to the pan. stir again to coat all. i think i added a nice rip of fresh parsley (chopped) and stirred that in as well. taste, tweaking salt/pepper if needed.  my noodles happened to finish up at the same time all of this  was happening-  so i simply strained them using the same colander i strained the beef with, and then added them straight into the pot. it was like angels were singing in Russian as this ethnic dish came together!  stir to combine and enjoy with some warm bread. i chose an organic french baguette and sliced it ultra thinly… with plenty of butter on each piece.  ((hey… don’t judge… i was ALL IN this night as far as richness and indulgence went!))   Enjoy… and you’re welcome yo!!  PS- even better the second day!

pics of the process below.

adding the browned beef to the slow cooker in the morning.
melting ze butter (no margarine puh-lease!)

could make a meal out of the sauce and bread alone sans noodles!!

creamy, tender, melts in your mouth with each bite...
creamy, tender, melts in your mouth with each bite…

ten minutes to fresh hummus

022

“A healthy snack in minutes… literally… you won’t believe how easy it is.”

The first time i made hummus two thoughts popped into my head.  one- – you have got to be kidding me… this easy??!! there has to be something else, some complicated step….  and two- –  i will never ever pay 4$ for a small container of hummus again!!   Hummus is one of the most versatile dips/ condiments… call it what you will- out there today in my opinion.  it can be your first layer when building a veggie sandwich or pita, it can be carried from dish to mouth on pretzels, carrots, zucchini strips, bell peppers, celery… the possibilities are endless.  use it instead of mayo on your next chicken sandwich  or wrap and you have saved yourself some fat and added some protein!  the fat that hummus does contain comes from the olive oil and the tahini (ground sesame seeds) which are the heart- healthy fats you should be getting more of anyway.  hummus is a staple in Middle Eastern diets, but it has certainly gone mainstream over the past few years, so much so that it is served weekly in my daughter’s elementary school lunchroom as “ha ha hummus” ! (i love it)  the taste is very distinct… even i will admit that- but somehow, it works. it is delicious, and becomes as addictive as those packaged sour cream and chive dips we all grew up noshing to our heart’s content (or discontent, lol) with greasy potato chips at every family gathering.  chickpeas are the main ingredients in hummus, also known as garbanzo beans, and they are truly a staple in most vegetarian and vegan diets today. they have no cholesterol, and in studies have actually been shown to prevent the build up of cholesterol in blood vessels. they are high in protein, and have no saturated fat.  they are both filling and satisfying at the same time, and can be cooked in with rice or stews or thrown on top of salads – taking the place of meat with ease.  enough about chick peas. let’s get down with the hummus.

INGREDIENT LIST:

one can of chick peas (organic if able please)

one bottle of tahini (you only use a quarter cup- this will last for six months or more in your fridge- shake well before using)

olive oil

garlic cloves

lemon juice (fresh if able please- one lemon will do- put the rest in your water for the rest of the day)

salt if desired

OK HERE’S WHAT YOU DO:

get out your food processor or heavy duty blender (i’ve never made it in the blender, but i’m sure it would work out fine.) Open and rinse your can of chick peas.  Add them to the food processor. Shake your container of tahini well, and add a 1/4 c atop the chick peas.  Squeeze 2-3 Tablespoons of fresh lemon juice into the mix (careful not to add seeds).  Peel and crush 2 cloves of garlic and add.  Add 2 Tablespoons of olive oil.  Add a generous pinch of salt if desired.  Attach the lid and fire her up.  process until smooth, adding water a Tablespoon at a time if you desire a more thin consistency.  turn it out to a serving dish and enjoy!! store in an airtight container in your fridge for up to two weeks, stir well each time before snacking.  this is the basic recipe… feel free to add some sundried tomatoes, using the oil from the tomatoes instead of the straight olive oil and adding a tsp of oregano.  this would give it an italian flare.  go greek with a half cup of feta instead of the tahini- and a cup of baby spinach leaves in place of the garlic.  like roasted red pepper?? go there. the possibilities are endless.  happy blending yo!!

the tahini i chose
the tahini i chose
everybody in the tub!!
process until smooth
turn it out to a bowl and enjoy!

stellar beef stew


melt in your mouth tender

There may be things better than beef stew and baked potatoes and home-made bread…. There may be.”

i am always looking for a recipe for a fabulous Beef Stew…. one that has depth of flavor, melt in your mouth beef,  but doesn’t take half the day to prepare and cook.  After making this modified version of Tyler Florence’s Ultimate Beef stew, i’m fairly certain I won’t have to look any longer.  The preparation is very straight forward… not fussy at all.  once you cut your beef and prepare your veggies, it’s easy sailing to a cool weather dinner you won’t soon forget.  this recipe calls for a whole bottle of red wine. I have prepared it with both Pinot Noir and a Zinfandel in the past… but a nice Cab or a bottle of Merlot would work out equally as well.  To be perfectly honest with you, I usually pick something that I enjoy drinking, and I pour a glass to enjoy while I prep the ingredients! (this dish will not suffer without that one glass- trust me.)  I generally  make it with a regular onion, diced up and added fairly early on; but next time I plan to add the pearl onions like the original recipe calls for.  I think they will add an extra layer of rustic, yet fancy to the dish… if that makes any sense.  nonetheless, we are excited to try it that way.  I made it with fresh thyme this time around, but have also used dried thyme in the past.  today at work I just finished the last of this stew which I prepared three days ago.  it was truly just as good, if not better on days two and three. It reheats wonderfully, bowl by bowl for two minutes in the microwave.  if only all leftovers could taste this wonderful!  Granted, this is not something  you will make all of the time, given the expense of the beef and the bottle of red…  but instead will be chalked up as one of your ‘special‘ dinners in no time.


the ingredient list:

1/4 c olive oil

3 T of butter

1 cup of flour

2.5 or so pounds of chuck roast/ chuck shoulder roast/ pot roast/ or sirloin tip roast

salt and pepper

bottle of dry red wine

8 fresh thyme sprigs or a level teaspoon of dried thyme

6 garlic cloves, peeled and smashed

1/4 t ground cloves

2 bay leaves

1 can beef broth

14oz can of diced tomatoes

5 Yukon gold potatoes (small to md) washed and diced- skins on

four large carrots- peeled and diced

2 cups of frozen pearl onions (or half of a large Spanish onion- diced)

if  you like mushrooms, add some. I used four Crimini mushrooms- wiped clean and large diced.

flat leaf parsley for garnish

OK HERE’S WHAT YOU DO:

cut up your beef into 1.5 inch cubes- trimmed of most fat.

058

– prep your veggies as above. – open your cans and uncork your bottle of wine.  OK let’s roll. Add your olive oil to a heavy sauce pan or dutch oven. Add some heat- medium high. Add a cup of flour to a plate, salt and pepper your beef generously, toss beef in flour to coat, working with small batches at a time.  Add said beef to your hot oil in the pot. brown it on all sides/ flipping it around with a fork. remove to a plate, and repeat until all of the beef is browned.  Add the wine to the pan carefully and scrape up all the lovely browned bits from the bottom. Add your garlic, thyme, salt and pepper, cloves, bay leaves, beef broth, can of diced tomatoes, and diced onion. (if you are using the frozen pearl onions- do not add yet). Bring just to a boil and then reduce heat to simmer. cook uncovered for 15 mins. Stir lightly, and then apply lid, and cook for 2 hours longer.   At the 2 hour point, add your potatoes and carrots and pearl onions (if using) as well as your mushrooms.  Tyler suggests adding a large pinch of sugar at this point to balance out the acidity of the wine. He is smart AND cute.  continue to simmer for another 35 mins, stirring occasionally.  remove the thyme and bay leaves, and serve over egg noodles or campanelle noodles for a hearty meal that is sure to please.  sprinkle each bowl with some freshly chopped flat leaf parsley, and relish in the amazing meal you have just prepared.

024

beef stew


Blog at WordPress.com.

Up ↑

Cup of Jo

a pittsburgh hippie chick's unbridled love for all things food related

Everybody Likes Sandwiches

a pittsburgh hippie chick's unbridled love for all things food related

Sew Mama Sew

a pittsburgh hippie chick's unbridled love for all things food related

Not Without Salt

a pittsburgh hippie chick's unbridled love for all things food related

%d bloggers like this: