Search

Hotbox Hipster

a pittsburgh hippie chick's unbridled love for all things food related

Mexican at home… easy peasy lemon squeezy.

003

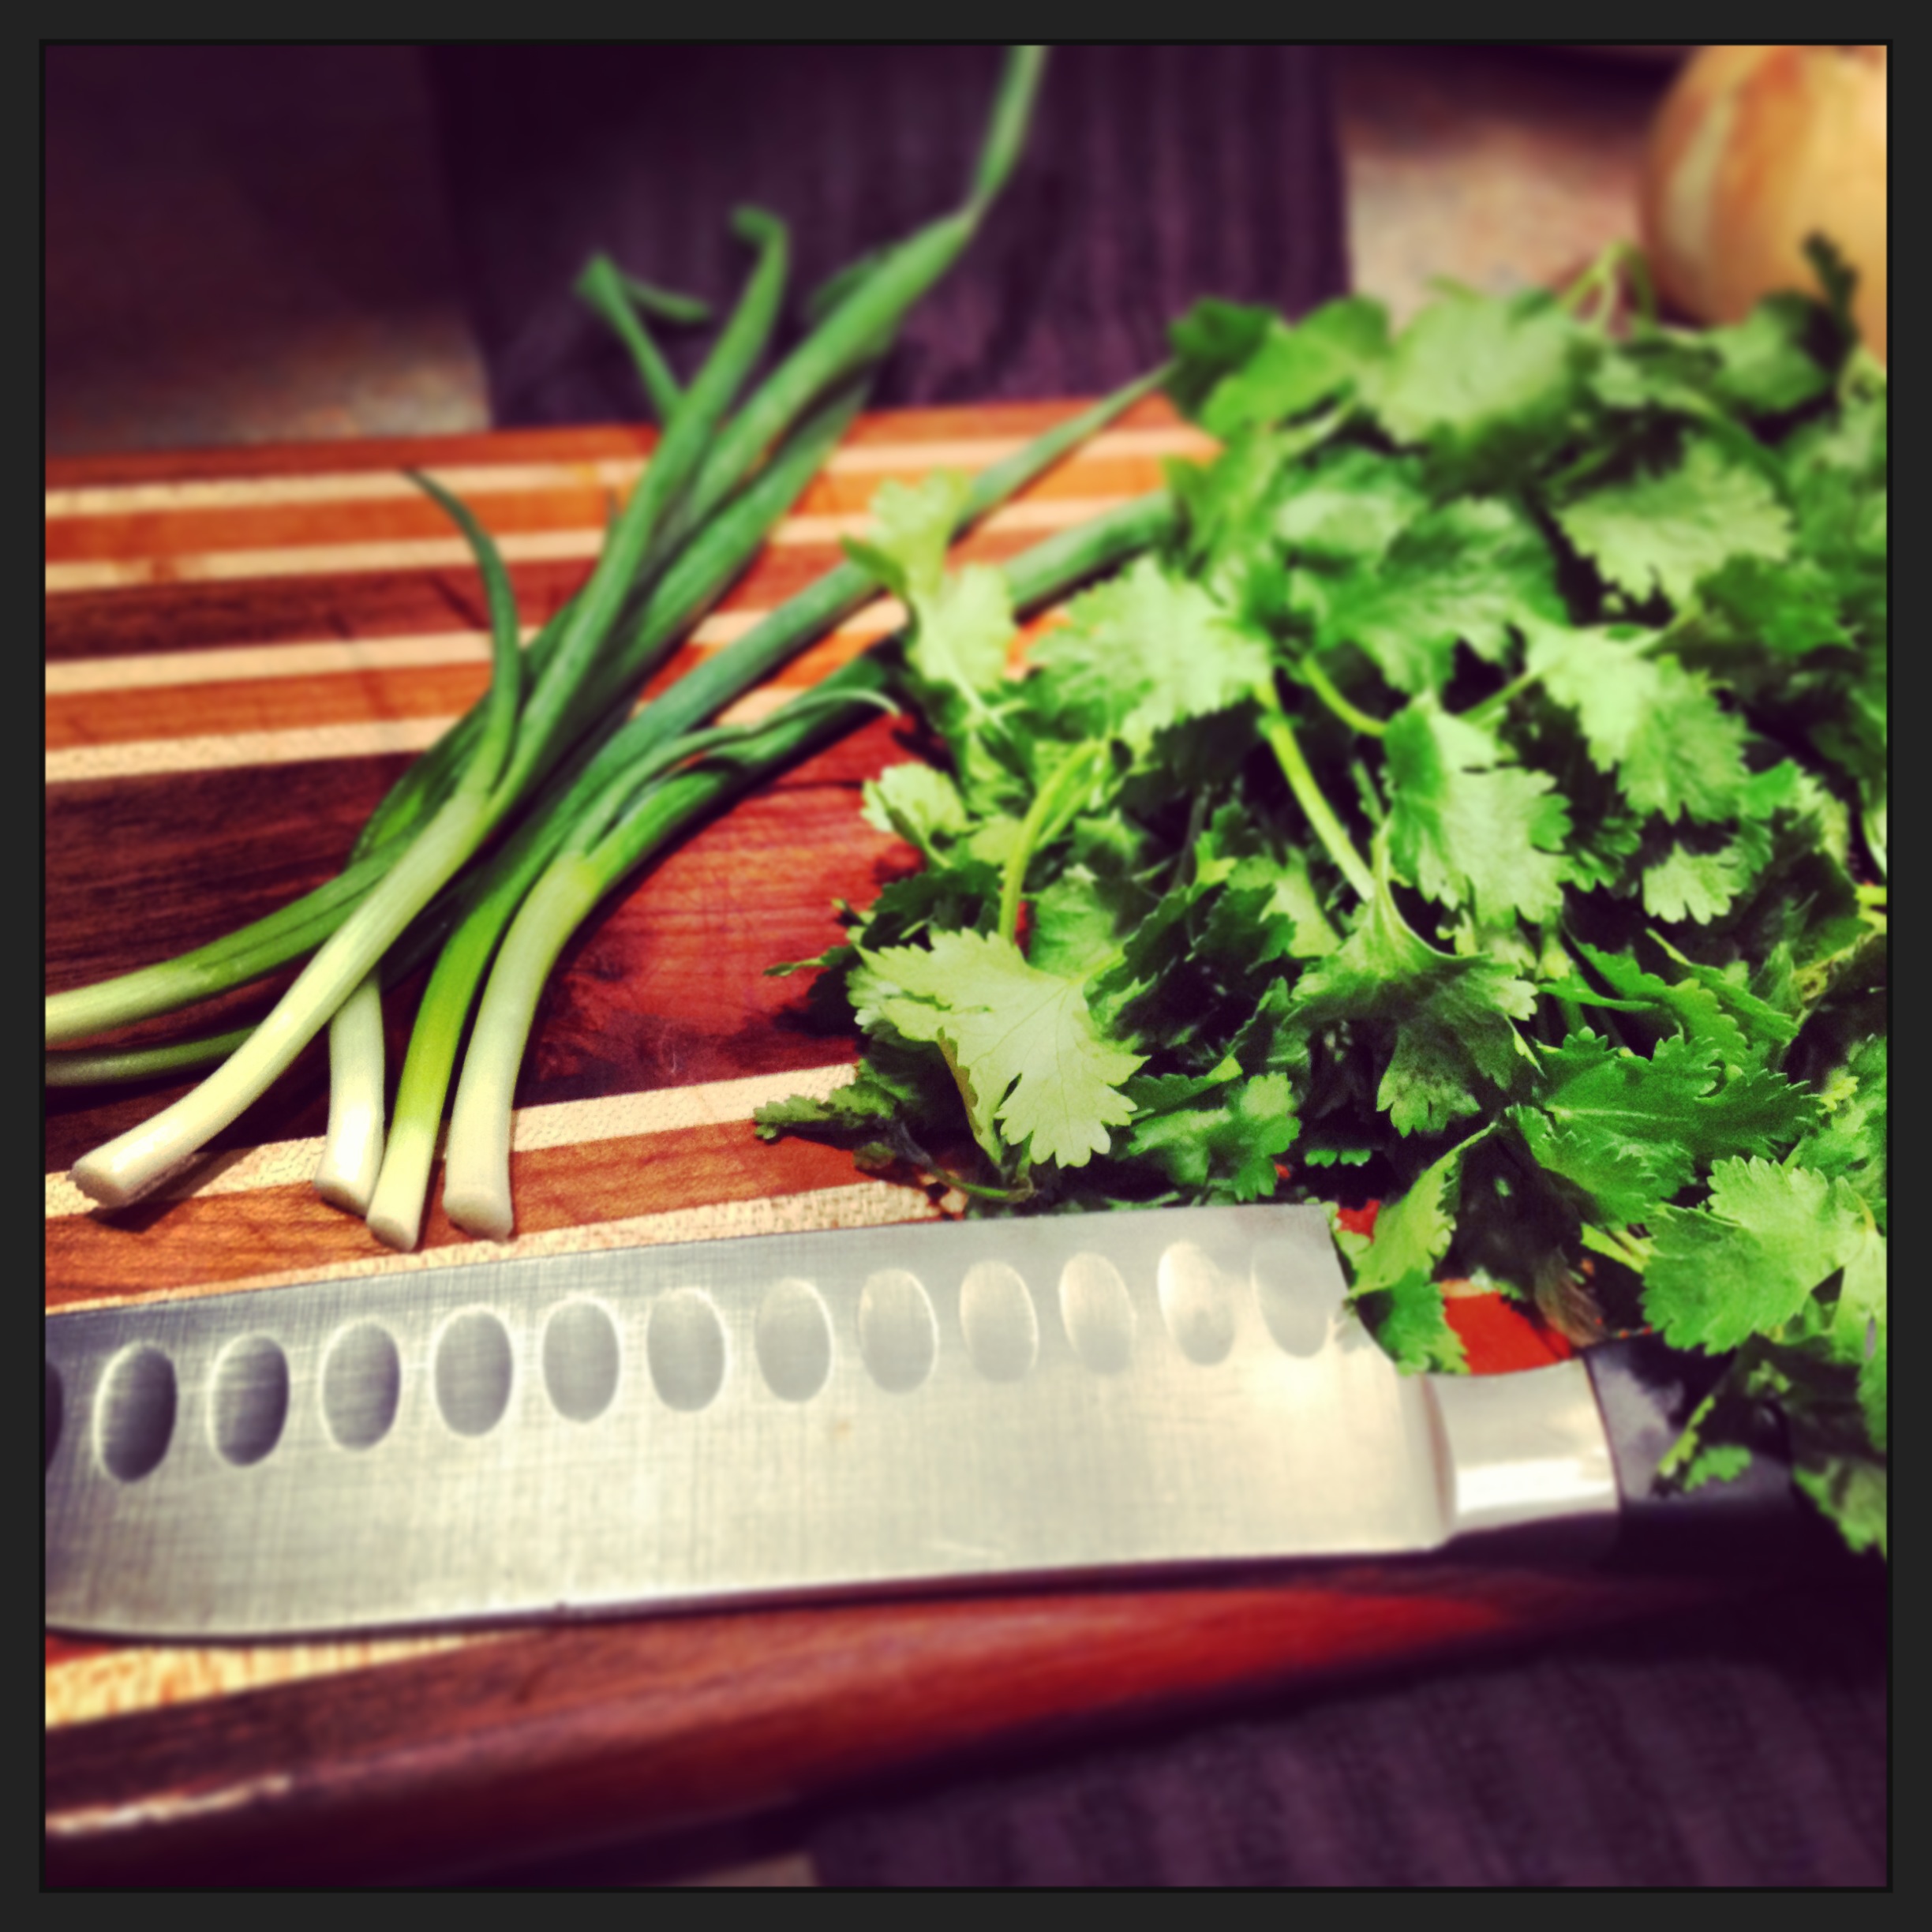
For some reason i have always felt i could not replicate the delicious tastes i encounter when eating out at a Mexican restaurant. i always felt that when i made it at home it was… good… but not WHOA good. it seemed to lack something each time. so being the food critic that i am, i decided to pay very close attention to the next dish served to me in some of our favorite Mexican joints in the Burgh. what i noticed was that each dish came out with plenty of fresh cilantro mixed on, and sometimes INTO the food. another thing that stood out were green onions. their flavor is so mild yet so fresh… one might miss their role in the dish unless you were really paying attention and looking for answers, as was i. i decided at that moment i would never again prepare Mexican food without those two ingredients.

the Mexican dish i like to make most at home is the beef enchilada. when you start with fresh, lean beef… and add in amazing spices and fresh ingredients- it is transformed into a filling worthy of eating on it’s own. THAT, my friends is how you know your dish is going to be absolutely amazing at the end- when you can’t stop sneaking tastes of the filling itself! (i do the same thing with my stuffed italian shells when i prepare them with cream cheese vs. Ricotta.) and to think that you are about to fill some lovely soft fresh tortillas and coat with delicious sauce and plenty of cheese???  yup… they’re gonna smile.

Here’s what you need:
fresh lean ground beef (93 lean is best)- a pound or slightly over
half of a large onion – small diced
4oz can of diced mild green chiles
shredded cheese (a bag will do – either cheddar or the mexican blend)
one small can of enchilada sauce (i use mild, bc i flavor my meat spicy and i don’t want sauce to overwhelm and ruin those flavors.)
one package of soft flour tortillas (a ten count will do fine)
fresh cilantro
green onions – one bunch
red pepper flakes
salt
cumin
chili powder
ground coriander (if you have it- it’s not going to make or break the dish- coriander is cilantro in seed/powder form- so if you have the fresh- you’ll still get that flavor punch- side note: you can use this in the rice as well- and i use it in a lot of things- so might be worth having)

Here’s what you do.
add a small swirl of oil to a large pan. (can be non stick or stainless- either way)
over medium high heat, add a few shakes of red pepper flakes.
add in your onions and saute them for a few minutes.
add the beef, and begin to break up and even it out in the pan.
once this begins to brown a bit, add your spices to it. (1/2 t salt;
1/2 t cumin; 1/2 t chili powder; 1/4 t black pepper; and a nice shake of coriander.
stir to combine.
keep working it around- once you don’t see any more pink- add you can of diced chiles. stir to combine.
then stir in a 1/2 cup of shredded cheese, and lastly- about a Tablespoon of chopped fresh cilantro.
combine and turn off the heat. let it set for awhile while you get your rice going. (recipe follows) or if you have someone cooking WITH you… let them man the rice, and you focus on the enchiladas. i do them both at the same time… but it is an orchestrated event as to not ruin any part of the dish! gage your comfort level and cook accordingly. 🙂
once your rice is going- fill your tortillas.
preheat oven to 350 degrees.
in a pyrex dish- coat bottom with a thin squiggle of olive oil (or wipe some on with a paper towel to coat) this helps the enchiladas to release nicely when you are serving.
fill each enchilada with a bit of meat- (do not overfill) – if i had to guess i would say it was 1/4 cup.
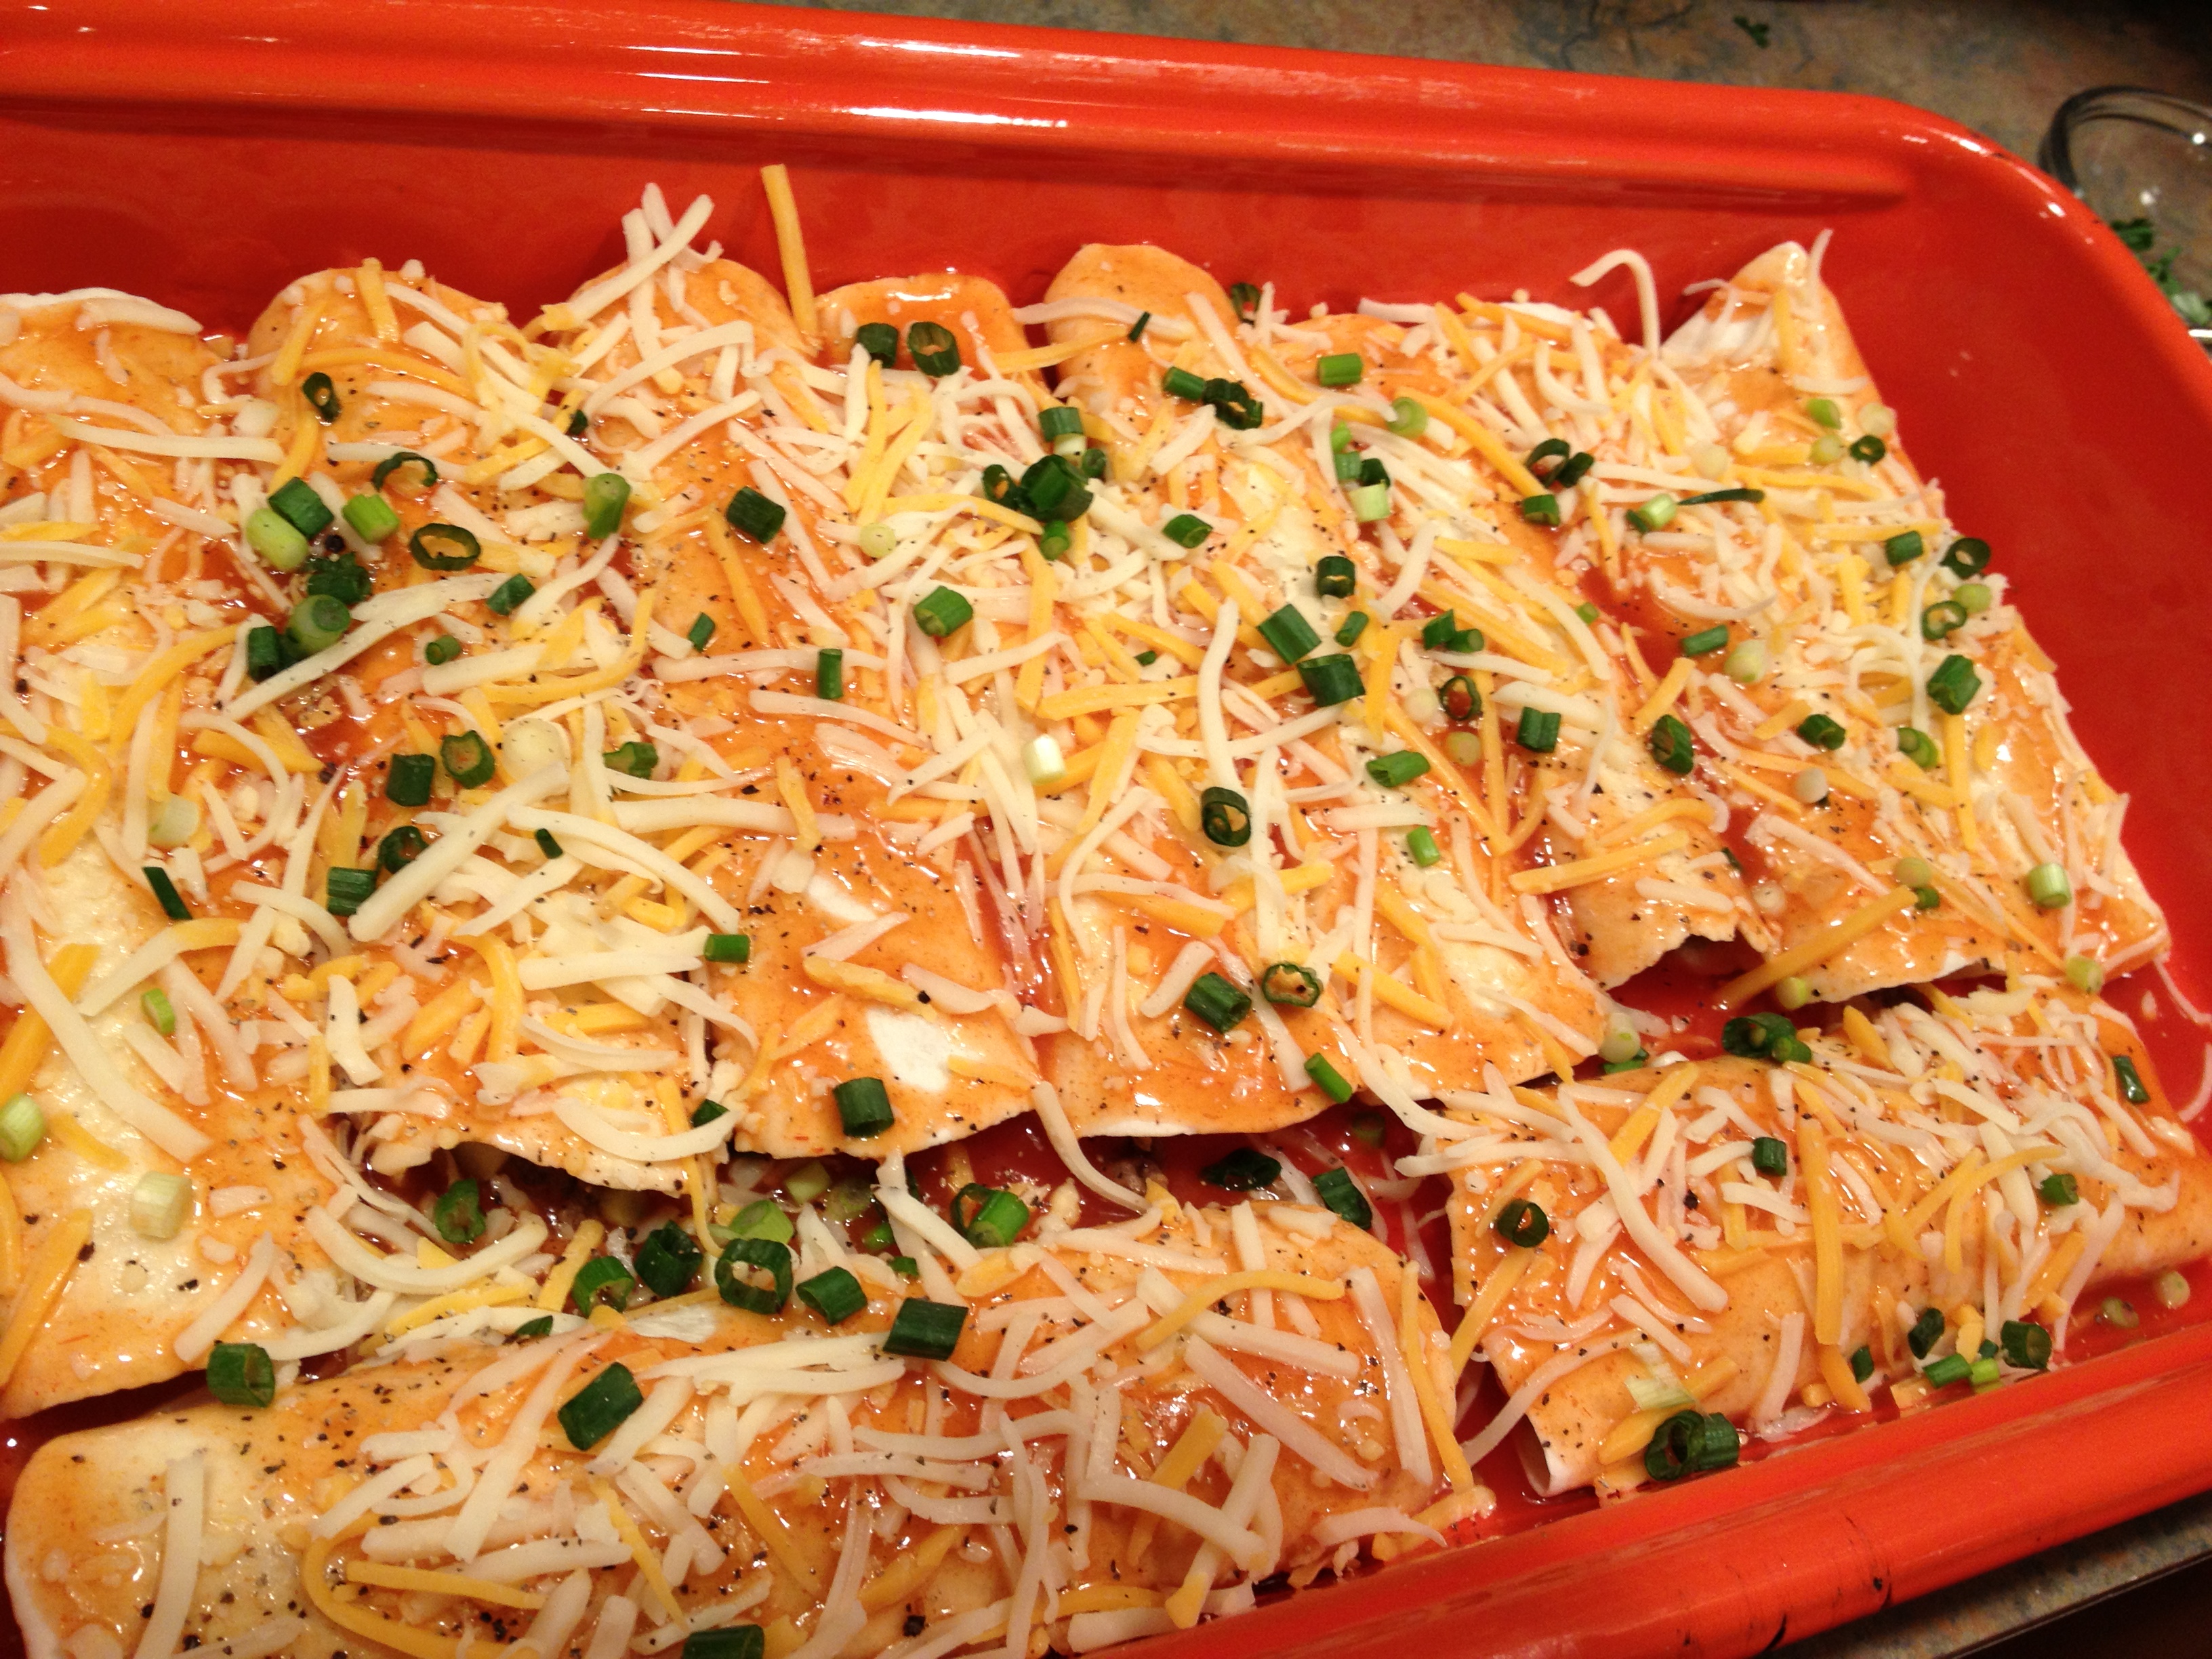
place seam side down in prepared dish. (see visual below) pour sauce atop evenly (they do not need to be completely coated or saturated- it is for flavor and you still want to ‘see’ the enchilada you’re eating)
generously sprinkle with cheese and diced green onions. (save cilantro for when they come OUT of oven) – sprinkle with black pepper as well
Bake at 350 for 25-30 minutes.

prepared pan- ready for the hotbox!!
FINITO!! and smelling amazing, PS.

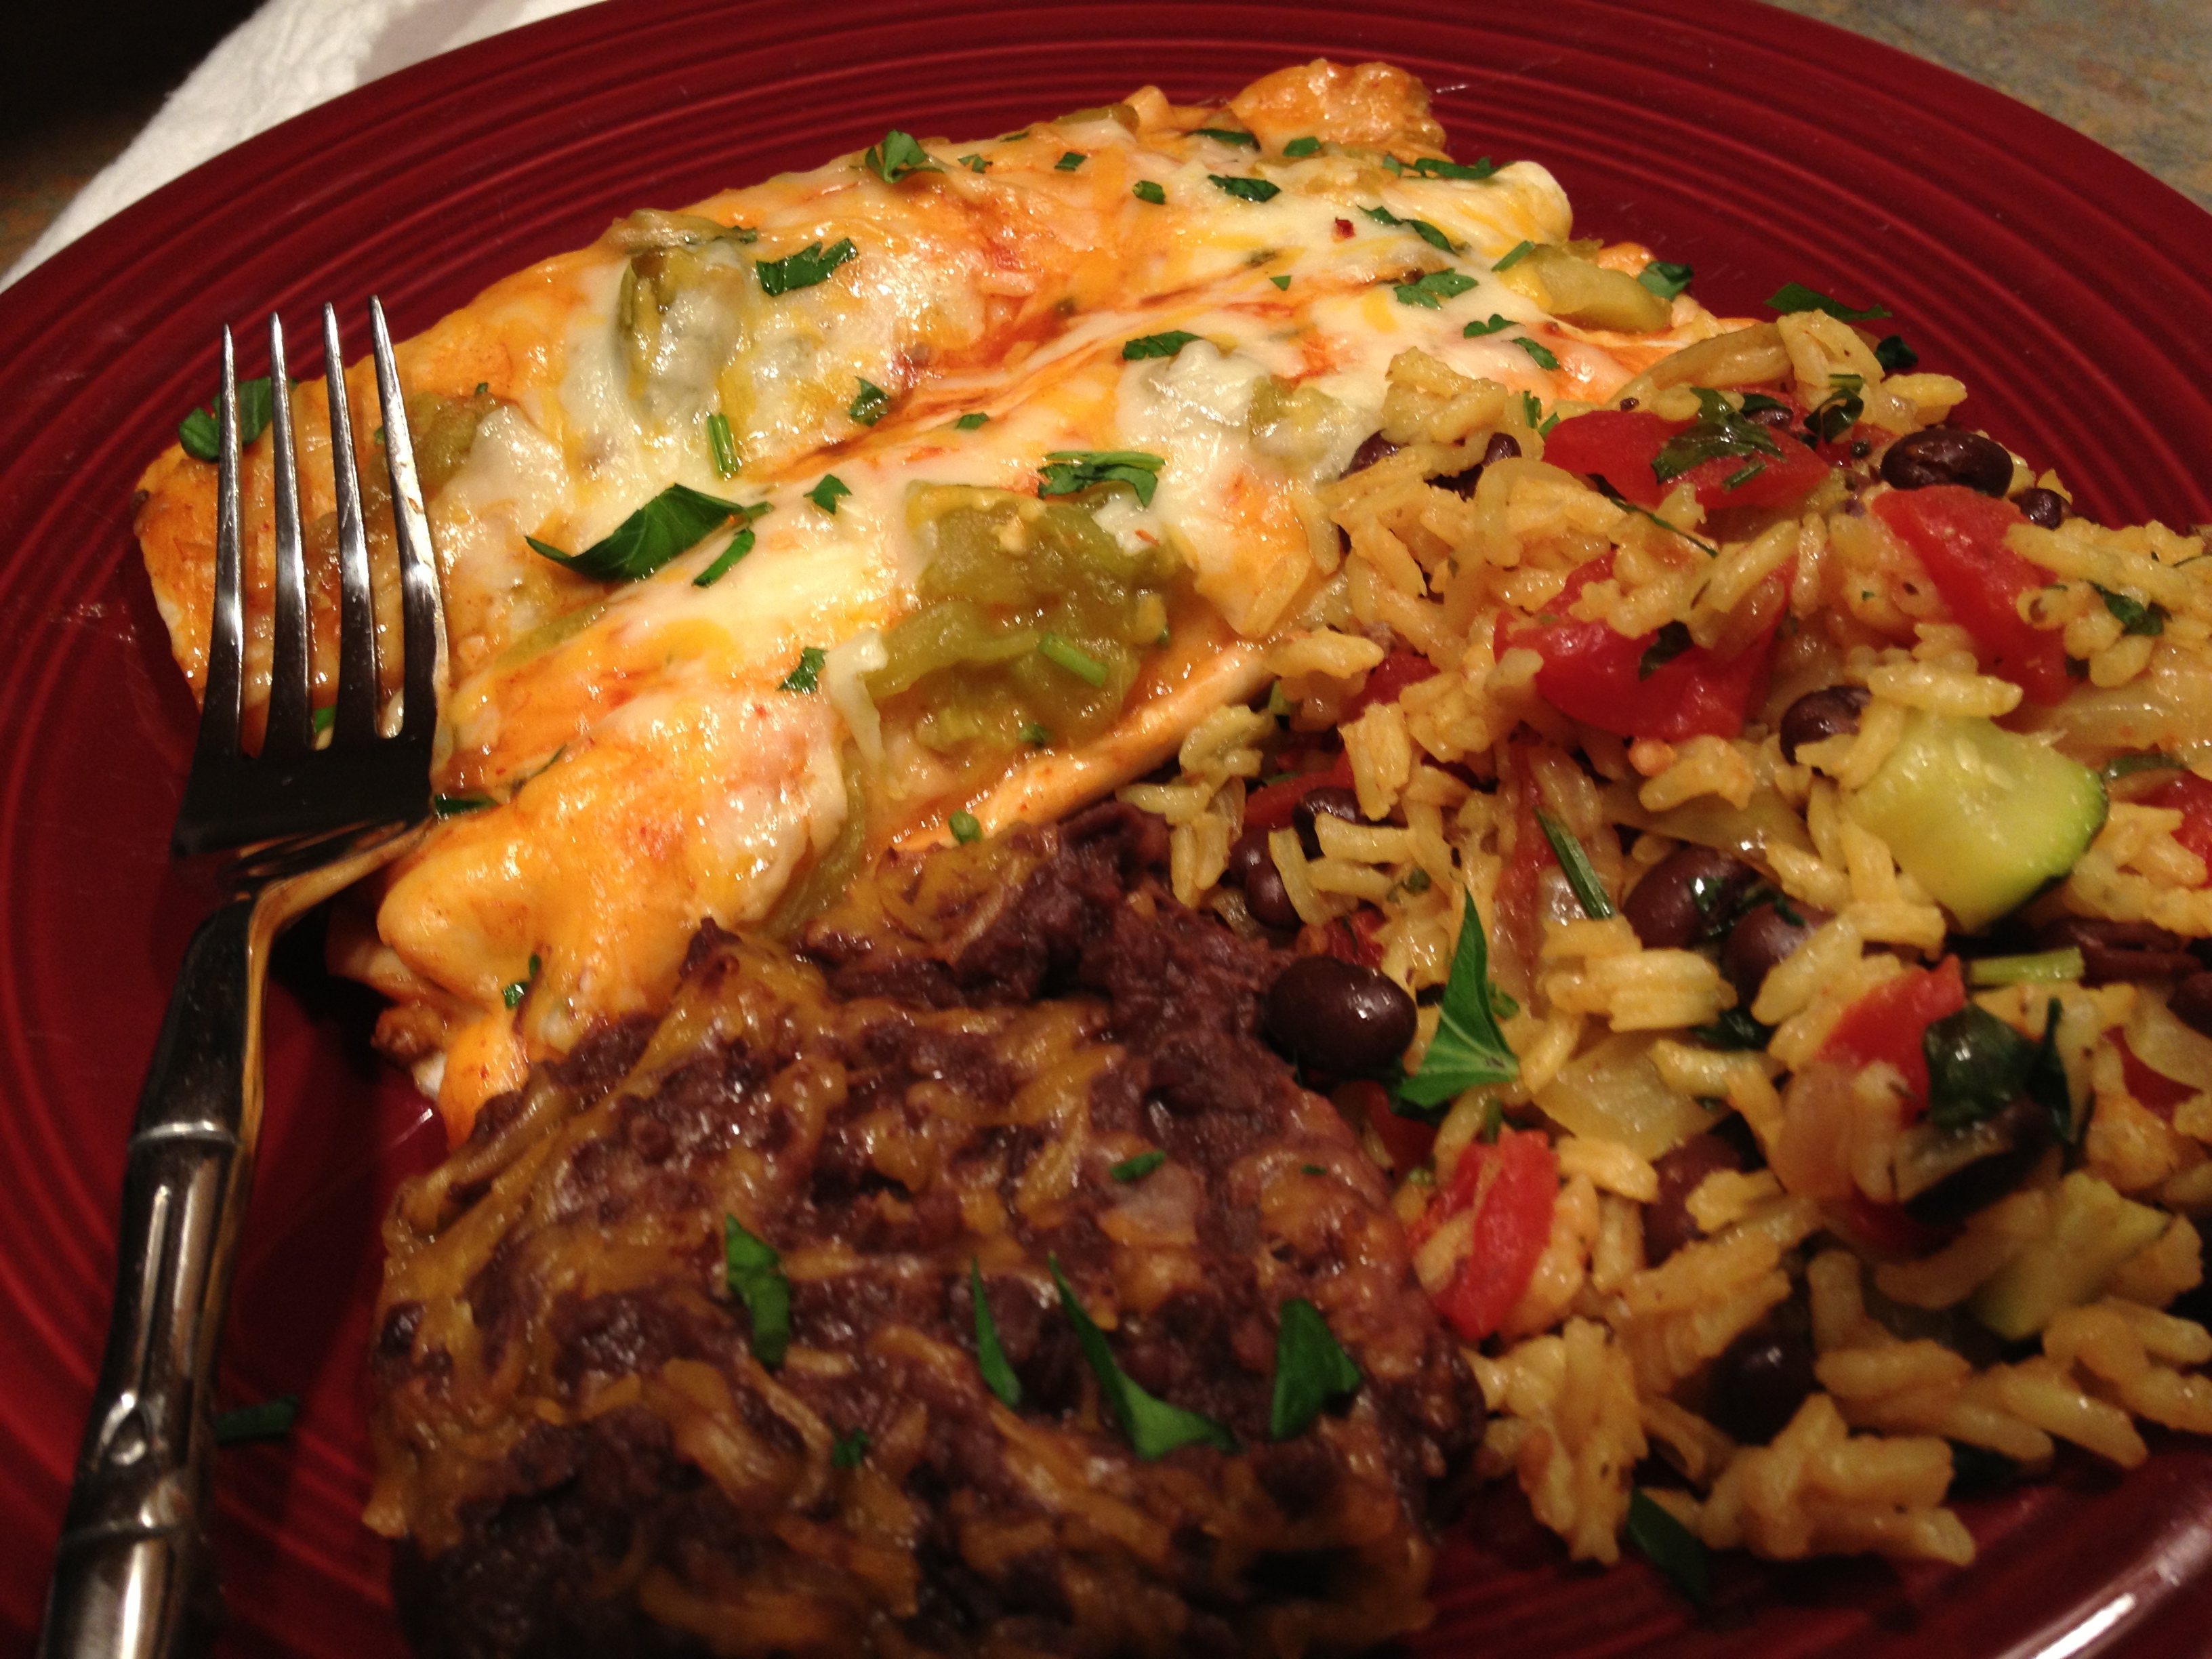
once you take these out of the oven, go ahead and hit them up with a generous shower of chopped fresh cilantro.  do it while the cheese is hot, as it will hold on the herbs nicely this way!  i highly recommend allowing these to rest for ten minutes or so… if you try to take them from pan to plate immediately- you will have a mess. give them some time to ‘set’ a bit- and also this way your lovelies can dig right in without burning their mouths once you hand them their plate of goodness.  🙂  i love serving this with black refried beans- which i do serve from a can. i buy these in the mexican aisle of your better grocer- and always opt for organic if it’s an option. simply turn them out into a bowl, sprinkle about a 1/2 cup of shredded cheese atop, and microwave for about two minutes. stir lightly, and serve.  if you have an aversion to refried beans… ( i used to, until i tried these.. and i absolutely love them now, PS) go ahead and serve with some fresh veggies or a simple salad, your call.

now… on to the RICE. this is a rice recipe i have dubbed “mom’s yummy rice” in my household. it is easy- yet over the top good. it does call for turmeric, which not every lay cook will have, but i do recommend purchasing some- as it gives lovely color to your rice. (it turns it a lovely yellowy hue) 

Here’s what you need:

a cup and a half of long grain white rice (not Minute rice- this is the real deal)
olive oil
1 large chopped onion (big vidalia or spanish)
15 oz can of diced tomatoes- undrained
15 oz can of chicken broth
–(i normally also add either a can of chick peas or black beans – drained and rinsed- but for this particular food pairing- if you are serving refried black beans- you may want to leave the beans out of this recipe) – if making this at other times however, just for a side dish… add a bean to the mix for sure.
1/2 tsp of salt
1/4 tsp black pepper
1/4 tsp ground turmeric
shake of cayenne pepper
pinch of cinnamon
fresh cilantro (chopped)

Here’s what you do:

Heat 2Tablespoons of olive oil in a large non stick skillet. Add one large chopped onion. saute five to ten minutes stirring frequently and then add 1.5 cups of rice. stir in and saute a minute or two, allowing to heat up a bit. Add another tsp of olive oil, and then add your tomatoes and your can of chicken broth. (if using beans or chick peas, add them at this time- remember to drain and rinse first) add your spices, including a small handful of chopped cilantro. stir, and bring just up to bubbling and then COVER. reduce heat to simmer- and cook for 15 minutes. DO NOT STIR THE RICE AT ALL AS IT COOKS- THIS WILL RUIN IT AND MAKE IT A GUMMY MESS. trust me on the time- it’s 15 mins at a simmer. cut heat, remove lid and stir lightly- i tell people to take your spatula, and with the back side of the spatula, take and kind of push your rice around a bit, loosening it from the bottom. do not full on stir it up- again- you want it to stay light and fluffy. sprinkle with plenty of cilantro- and if you desire, move the rice to a nice serving bowl at this point- and even hit the top again with salt, pepper, and more cilantro.
VOILA!! the perfect partner for the enchiladas above- or any main course for that matter. we prepare this rice frequently as a side in the summer months- adding fresh chopped zucchini at the end- or just as is alongside some grilled citrus chicken- or a nice steak kebab. i hope it becomes a go to recipe for many of you. Enjoy yo!!

yummy rice
yummy rice


all together now... YUMMM!!!
all together now… YUMMM!!!

wonderful world of Etsy

i have to say i am very excited about the recent opening of my Hotbox Hipster etsy shop- and i felt it was very necessary to share this information on my food blog! many of my blogging friends have varied interests, to say the least, and i happen to be one of them.  not only do i enjoy cooking and baking,  but i also enjoy knitting and sewing and writing and jogging and photography and entertaining and interior design and food styling, and the list goes on and on….  so i decided to share one of my variants with my food loving community. i have created an Etsy shop, with the Hotbox Hipster’s name,  to market my unique gooderies to the general public.  my goal is to create items/gifts that are hard to find in the big box stores… items made with love… peaceful love.  i’m trying to create an even mix of children’s items, lady goods, and household lovelies.   each item will be wrapped with colored paper from sustainably managed forests, and tied up with happy hemp twine. i will ship in a recycled brown grocer’s bag – meaning the whole packaging itself can be reused in it’s entirety.  two percent of my total sales each year will go to a local green project in my community. giving back is important, and one of my favorite quotes says it best… “If you wait until you can do everything for everybody, instead of something for somebody, you’ll end up doing nothing for nobody.”  check me out yo!  http://www.hotboxhipster.etsy.com

(PS- i commissioned my artist friend, Julie Schuler, to design and create my avatar -aka logo- and she did an amazing job, capturing my varied interests… the go green tee, the food skewered onto knitting needles, the scarf in progress around my neck, the recycle symbols in the name, and my running shoes and shorts. she is truly an amazing artist- and her paintings are out of this world. click on her name above to fall into her world.)

hipstercolor1


jacked up banana bread yo!

“If there’s no chocolate in Heaven, I’m not going.”
―    Jane Seabrook,    Furry Logic Laugh at Life


olympus master 2 020

so i had totally planned on making my mom’s classic sour cream coffee cake this afternoon, but i got to clicking around on some food blogs… and it took about twenty seconds for me to decide to make this ‘jacked up banana bread’ recipe i came across. i was looking at a blog called Everybody likes Sandwiches… and she was talking about adapting this recipe she had enjoyed from Smitten Kitchen, another blog i enjoy.  well, clicking further into recipes on the sandwiches blog, (which i often find myself doing) i discovered she has made three different banana-ish type of breads that left me drooling.  i pulled up two of them, and clicked back and forth- yanking them around a bit and taking ingredients from each… tweaking as i went. the result was the most amazing banana bread i have ever repeat  E-V-E-R  had.  best part, to hell with vanilla… we went Rogue and added Captain Morgan tattoo rum. a whole Tablespoon of it.  i think you’re gonna dig it.

you will need:

3 brownish bananas (mashed)

3/4 cup brown sugar

1 stick butter (semi melted)

1 egg (beaten)

1 T. captain morgan spiced rum

1/2 t. cinnamon

1/2 t. nutmeg

1/4 cup sweetened flaked coconut

1.5 cups flour

1 t. baking soda

1 T. cocoa powder

1/2 cup chocolate chips

Combine first 8 ingredients (through coconut) in a mixing bowl and combine on low until incorporated.  in a separate bowl whisk together flour, bkg soda and cocoa powder. add slowly to mixer bowl- combine on low speed.  add chocolate chips and finish mixing by hand.  add to a greased loaf pan and bake in a 350 degree oven for 57 minutes. test with a toothpick- when comes out clean, it’s done!  cool in pan for fifteen minutes, and then remove to a cooling rack or soft towel to cool completely on the counter.  prepare to be blown away yo!

“All you need is love. But a little chocolate now and then doesn't hurt.” ― Charles M. Schulz
“All you need is love. But a little chocolate now and then doesn’t hurt.”
― Charles M. Schulz
“Seize the moment. Remember all those women on the 'Titanic' who waved off the dessert cart.” ― Erma Bombeck
“Seize the moment. Remember all those women on the ‘Titanic’ who waved off the dessert cart.”
― Erma Bombeck
“The only real stumbling block is fear of failure. In cooking you've got to have a what-the-hell attitude.” ― Julia Child
“The only real stumbling block is fear of failure. In cooking you’ve got to have a what-the-hell attitude.”
― Julia Child


Maine pancakes

“Why, sometimes i’ve believed as many as six impossible things before breakfast.”

Lewis Carroll – Alice in Wonderland

Maine Pancakes

013

i remember writing this recipe down nearly 13 years ago, one lazy winter day at work thumbing through my employer’s many cook books in my days as a full time nanny. it sat in my recipe box… and it sat… until one day i made it- i think after i acquired three lovely cast iron skillets from an estate sale in the city for five bucks.  after i made it, that was it, i was smitten. it was unbelievably basic, and i loved the way it puffed up in the oven… a real show off right off the bat- and perfect for impressing an overnight guest in the morning. who, in those days happened to be my husband (we began dating around that time) most weekends.  you start this on the stove, just to melt the butter… and then once you pour in a bit of batter, into a hot oven it goes for ten minutes.  the puffiness is short lived (extremely) so if you’re trying to wow them, be sure they are near their plate once you pull this out of the oven. have their fixings ready- i recommend fresh fruit, maple syrup or honey, and plenty of powdered sugar in a sifter to lend a nice sweetness to it’s simple flavor.

you need:

2 large eggs- lightly beaten

1/2 cup flour

1/2 cup milk

pinch of salt and a pinch of nutmeg

T. of butter

powdered sugar for dusting

Heat oven to 425. Whisk together eggs, flour, milk, salt and nutmeg until well combined. May be a little lumpy. melt a T. of butter in a cast iron skillet over medium heat. pour batter into pan, enough to generously coat bottom (but not too much) – and transfer to oven. bake for 10-12 mins until pancake is golden brown and fluffy. Transfer to plate immediately and dust with powdered sugar.  enjoy!

“We've only been sitting here forty minutes. I'm never at the morning table less than an hour and a half. I do some of my finest plotting over breakfast coffee and raisin brioche.” ― Dean Koontz, Forever Odd
“We’ve only been sitting here forty minutes. I’m never at the morning table less than an hour and a half. I do some of my finest plotting over breakfast coffee and raisin brioche.”
― Dean Koontz, Forever Odd
never work before breakfast;  if you have to work before breakfast, EAT breakfast FIRST. -Josh Billings
never work before breakfast; if you have to work before breakfast, EAT breakfast FIRST.
-Josh Billings

a most creative pittsburgh pasta!

do you love keilbasa but never know what to do with it beyond a simple sandwich with some fried onions and peppers? with no disrespect to the pittsburgh fave keilbasa sammich… i offer up a more gourmet alternative for your linked buddy. this recipe is one that i made up one day when i realized how delicious keilbasa was cut thinly and fried in a skillet.  take heed: it shows some major restraint not to eat half the plate of the crispy little circles as you prep the rest of your meal… for real.  when you fry them up in some olive oil over hight heat… they take on an incredibly dark almost carmelized hue and become all crispy around the edges.  as i show you the before and after photo below, note the juice on the plate with the cooked pieces resulted from deglazing the pan with a generous amount of white wine. (i’ll explain later) reserving some of this liquid to add back in at end with cooked keilbasa adds amazing depth of flavor to the whole dish.

cut on a slight angle

and the after shot… what a fabulous transformation.

resist resist!!! whoa nelly good….

so here’s what i did to create this go to week night dinner.  dice up half of a large onion. set aside. slice your keilbasa on a slight diagonal- about a quarter inch thick. set aside. open a small can of diced tomatoes. place a half a bag of frozen peas in a cereal bowl and set aside. dice a colored bell pepper and set aside.  uncork a bottle of white wine (i used pinot grigio tonight). open a can of chicken broth- you will use less than half of it. open a small can of tomato paste. (you will use about two tablespoons) – ok here goes.  first thing- start a large pot of water boiling so that you can cook up a bag of wide egg noodles.   do a couple of swirls of olive oil in a stainless skillet. (if you use non stick, you will not get a lovely coating on the bottom to be able to deglaze- so opt for a steel pot or skillet) heat oil over md high heat. once hot, add your keilbasa. give your downsides a chance to darken up before stirring, but be careful not to burn it! stir, and continue cooking until you are satisfied w the color. (see above visual) remove from skillet to a plate and set aside. if there is a large amount of grease in skillet, dump into a safe vessel to trash it.  (can from your recyle bin) with skillet over medium heat, slowly and carefully add a generous pour of white wine to deglaze pan. stir to release brown bits from bottom of pan. add your diced onion, and cook for five minutes until some of the juice is absorbed by the onions. add your bell pepper, the tomato paste, the diced tomatoes, and the peas. stir. please add any herbs you love at this point. i added a generous pinch of dried thyme, a shake of garlic powder, a shake of dried oregano, a half a tsp of salt, a shake of red pepper flakes, and a go round of black pepper.

begin to add to your base of sauteed onions.
stir and simmer…

once you have all of these things in your pot and give it a stir, you will note it is a little thick. add a bit of chicken broth to give the ingredients something to simmer in.  i never measure… so maybe a cup??  add in your cooked keilbasa, stir again-  and simmer uncovered for fifteen minutes or so. add your drained and rinsed egg noodles back into the empty pot you cooked them in.  carefully pour your lovely creation onto the salted egg noodles and stir to combine.  serve up with a nice crusty  loaf of bread- or more simply with a single glass of white wine.  enjoy!!

finito!!

homefries. plain and simple.

the homefry.  i’ve finally unlocked it.  after using several different pans and skillets and oodles of cooking methods, i nailed it.  the trick? a large enough cooking surface, plenty of olive oil, and a uniform cut.  my favorite potato to use is the yukon gold, hands down.  i find it to be the rockstar of all potatoes.  it fries up like no other, maintaining its sliced shape all the while.  not to mention the skin of the yukon is so paper thin, there’s never any reason in the world to remove it for a homefry. ever.  simply wash, dry and slice.  the size of your slice is a personal preference.  i find a width of 1/4 inch and an overall size of about an inch and half to be ideal to work with. it’s a trial and error game, for sure.

gaining a brown crust

here’s the gameplan: get the largest non stick cooking pan you own.  coat bottom with olive oil. (swirl to coat- don’t prep a drowning pool) prepare your potato on cutting board, so that you’re ready when your pan is calling. crank on the heat.  high first, and then just below high. add a sprinkle of crushed red pepper flakes. once you see the flakes sweating and dancing, it’s go time.  add your potatoes.  rearrange them so each and every one has plenty of contact face down in the oil.  see visual. now the hard part for us type A’ers… don’t mess with them.  this allows the down side to take on a beauteous brown hue, and a heavenly crispness.  this crisp side is critical to counteract the softness you’ll achieve at the end.  a plate of mush is what you’re trying to avoid at all costs.  salt the raw up side generously. check one after about 5 mins with a fork.  if you like what you see, take your spatula and flip it upside down in your grip. this is the way you wanna free your lovelies from the skillet.  you have to be fast, and apply a downward pressure toward the skillet surface at a 45 degree angle.  make attempts to rearrange with brown side upward. dust lightly with garlic powder and a sprinkle of dried parsley or oregano. (no need for pepper, as the red pepper flakes you tricked out your oil with will provide all the heat you need here)  obviously there are 50 ways you could flavor your potatoes.  i’m giving you the most basic recipe, with flavorings most every reader would have in their kitchen.  personally, i love mine with coriander powder, dried oregano, and even a pinch more salt.  if it’s summer and i have lots of fresh parsley outside… i’ll chop a bit and rain it down over my plate to finish. ok, back to cooking… cook like this for a few more minutes, and then add a 1/4 cup of water to hot skillet- IMMEDIATELY applying lid to steam them for a bit.  reduce heat to medium and allow to cook for 4 minutes or so.  stir- check for doneness, cooking a bit longer uncovered if needed.  enjoy with your favorite condiment. Heinz ketchup is a natural local partner for us Pittsburghers. -see visual.

perfect and simple anytime meal…
 
made even more perfect.

winner winner chicken dinner

celebrate the Fall season with this festive dish

there’s no denying it… the Fall season is in full swing- and the proof is all around us.  ground surfaces are being overcome with leaves, the clocks have been wound back, the jack o’lanterns have found their way to the compost heap, and the air holds the perfect crispness- replicated by no other season.  we’ve been as busy as bees, bringing wood closer to the house from outlying racks, stacking and sorting it, putting away patio furniture, stocking up on birdseed, and cleaning up the beds in preparation for the cold months ahead.  -and although i am more than happy to assist with all of said tasks… my cold weather preparations lie in test driving new and exciting soup and stew and ‘ladle over a bowl of rice’ types of recipes.  the air turns cold, we eat warm things.  makes perfect sense, right?!  nothing brings more pleasure, in my opinion, than a nice steaming bowl of savory stew to be enjoyed with some crusty buttery bread in a nice den with a fire.  typing that sentence alone gives me a killer visual… one where i fall asleep with a book on my chest… empty bowl beside me on the table… not a care in the world, right?  snap* snap* back to reality for most of us.  there’s homework to be done, bathing children, DVR’d shows to watch… so is the life of most Americans my age today.  (someday i will OWN that visual though… i suspect it will begin in my sixties, as i simultaneously OWN a grey bob haircut)

for now, i have tried this recipe twice… and it is a winner yo.  winner winner chicken dinner. (sorry) it allowed me to use a spice i’ve been dying to try… garam masala. garam masala is a yummy blend of many spices, often used in Indian cooking.  it’s very meaning is ‘hot mixture’ – and i’ve read about various combinations including some of the following: cloves, cinnamon, cumin, cardamom, peppercorns, ginger, star anise and turmeric.  i bought mine at the bulk spice section of whole foods, allowing me to buy just a couple of tablespoons for around 34 cents. (LOVE whole foods, but who doesn’t right?)  anyway, the preparation on this is pretty easy… and it even forces you to open a bottle of white wine, of which you will use half. i used a bottle of gifted chardonnay that has been sitting on my wine rack for a year- as it is my least favorite type of white.  this gave me the perfect excuse to use it up in a delicious way.  please be careful at the point where you are adding the wine to the pan… (deglazing) if you are not used to doing this, i ask you to turn your flame off first, just to avoid any splashing and possibility of flames.  as long as you add slowly, you should be fine.  there is a time and a place for the culinary flames sent from deglazing… and an industrial kitchen is usually preferable.

ingredients:

one package of boneless skinless chicken breasts (either three or four in pack)

one cup of flour

salt and pepper

2 T butter

oil for the pan (i always use olive)

half a bottle of white wine (chardonnay, pinot grigio, sauvignon blanc, reisling, etc)

14 oz can of diced tomatoes

1 bunch of green onions

2 teaspoons garam masala

1/2  teaspoon salt

1 teaspoon garlic powder

rice

so here’s what you do: cut your chicken into bite sized chunks, removing any skin or tendons.  salt and pepper your chicken. uncork your wine, so you are ready at that step and not fumbling to open it as your pan scorches.  add your cup of flour to a plate so that you are ready to dip your chicken in it.  open your can of tomatoes.  rinse and chop your green onions using all but the top inch or so of the greens.  prepare your spices in a small dish- setting aside a half a tsp of the allotted 2t of garam masala- as you will add it at the end.  ok, saddle up- here we go.  choose your favorite large skillet with a lid… can be either non stick or stainless- either way.  add a generous drizzle of oil to the pan, and add your butter.  turn on the heat to md. high.  working in batches, take a portion of your diced raw chicken, and set it in the flour. begin coating the chicken by flipping it around a bit in the flour. take the chicken in your hands and shake off the excess flour over the plate (as much as you can)- and add to now ready skillet. brown chicken slightly, flipping each piece over and being careful not to crowd your pan.  work in batches, and remove chicken to a plate to rest once it’s been lightly browned. you may need to add more oil or butter to the pan at least once during this process.  (note, you are not out to cook the chicken at this step, only to barely brown it so the flour adheres to the meat. end note.)

browning the chicken a bit

once all your chicken has been floured and browned, cut your flame and add a half a bottle of white wine… slowly.  you will hear a searing sound once it hits the hot skillet. scrape up the lovely browned bits from bottom and sides of pan with a wooden spoon. (in case it’s your first time- you have just deglazed a pan!) celebrate with a glass of remaining wine. lol.  add your onions, tomatoes, spices (again leaving a half t. of the garam masala behind to add later), and chicken.  stir to combine. bring to a boil and then immediately cover and reduce heat to simmer. simmer like this for 35 minutes.  this is the time when you should prepare your rice.  cook enough rice for four servings, at least. at end of 35 mins, add your reserved 1/2 tsp of garam masala to the chicken dish- and stir to combine.  remove from heat and allow to rest for five mins or so, uncovered.  if serving for sit down dinner- carefully transfer to a nice serving bowl and serve with a big bowl of rice alongside.  family style.   this meal is sure to please, and i am certain you will enjoy.  it’s exotic enough to break up your usual routine… without being overly exotic or fussy.

spice is nice
‘company worthy’

peace and love. enjoy!!

turkey keilbasa and kale soup ~ a winter warmer

winter warmer

the keilbasa and kale recipe i am about to share with you is a recipe i’ve been making for 6+ years ~ and it’s the ONLY thing i prepare that my husband won’t eat.  we joke about it and say he’s allowed one dislike.  he dislikes the kale – and in general tends to complain about soup as a meal.  as a soup lover, this is painful to deal with, especially once the weather turns cold in Pittsburgh.  i have been known to eat soup for breakfast, so no problems with me finishing the pot solo. this last batch i made lasted for three days. i gave a portion to my sister, of which my mom ate a bowl for lunch. it fed me for dinner 2 days and breakfast 2 days. it’s an absolutely delicious recipe – it was adapted from an Emeril recipe.  kale is very beneficial, especially when steamed.  it’s fiber combines with bile acids in our bodies- and when excreted, helps to lower cholesterol levels. it has many cancer lowering benefits, and special antioxidant and anti-inflammatory benefits. it’s extremely high in vitamins K, A, and C… with the vitamin K level being off the charts, literally.  Plus, using turkey keilbasa instead of it’s full fat polish counterpart lowers the fat significantly. the last time i prepared it, i used a carton of organic chicken stock- which helped enhance the flavor even more. i hope you enjoy this soup as much as i do- and make it year round as the different ingredients become more plentiful.  it’s made to be toyed with… so add some shredded rotisserie chicken if you wish… or up the garlic to four cloves… you feelin’ me?

Turkey Keilbasa and Kale soup : the goods

1 T olive oil

1 fennel bulb (fronds removed- bulb chopped)

1 large onion chopped

3 cans chicken broth (or 32oz. carton of chicken STOCK- for more flavor)

7 cups of water

2 sweet potatoes (peeled and small dice)

1 package of turkey keilbasa (small to medium dice)

3 cloves garlic (minced)

3/4 cup uncooked orzo pasta

2 handfuls of baby carrots (or four large carrots- peeled and diced)

1.5  tsp of salt

1/2 tsp of black pepper

1.5 tsp of dried parsley

few shakes of cayenne pepper

big pinch of dried thyme

large bunch of kale – trimmed from stem and chopped a bit into bite sized leaves

(you will end up with a huge pile of kale… don’t panic, this reduces down greatly once added to the soup)

~saute in a large dutch oven or soup pot: fennel and onion in olive oil for about 5 mins or until tender/translucent. Add broth through herbs, (not kale) and bring to a boil.  Reduce heat, and simmer 15 minutes covered.  Uncover and add big pile of kale leaves and press down into broth – cover again and simmer for 15 mins more.  ENJOY!!!

kale- the super food
adding the kale
ready to serve
your big pot of yum
curing colds across america

~this soup truly gets better as it sits there… and the day(s) to follow.  if you like kale… or if you are willing to try new things… please attempt this.  please do not leave out the fennel (anise) either… once you saute it, your nose will tell you why.  it’s what makes this soup special.

peace and love yo.

spags 101

today happens to be what i believe to be – the sweetest day.  it is friday friends.  it’s a loaded gun.  it’s a full glass of water… or wine for that matter.  it’s the start of a playful tumble down a soft and cool grassy slope… the kind where you pick up momentum, laughing all the way. friday is a segway into uncharted territory… the wild and wonderful, or the lazy and delicious.  if you’re like me… it’s a little bit of both. always.  friday holds the promise of 2.5 days of undictated control.  you’re craving oatmeal cookies at ten pm?? giddy up. we can sleep in on Saturday- but for now LET’S BAKE.  (take those capped words how you wish… i won’t tell) – if your night is in… pop on some tunes after the tots go to bed, and take some time to reconnect with your husband/wife/partner. ask them about their challenges this week. talk about a dream you had last night. ask them what their favorite thing is about your home… about your body… listen to them. don’t interrupt. think about why you choose to spend time with this person. what is YOUR favorite thing about them? i can assure you that connections like these will have your weekend off to a fabulous start. tackle a saturday project together. be playful while doing so. always. decide on some dinner together. emphasis on together.  pour their sunday morning coffee. memorize how they take their coffee. suggest you cook their favorite meal later today. offer a way they can earn that meal… whispering or a hand written note usually works best, P.S. 😉  the take away point as i face a fun filled weekend ahead on this lovely temperate friday in the Burgh is this… look at every day as a vacation. when you are not at work, don’t be at work. leave it behind… it never runs out on you, this i promise. look at every evening as an event. ex: it’s TUESDAY bitches!!! i’m gonna stop off for my favorite bottle of wine, grab my tot’s favorite cookies at the grocer, download that new Beiber song that’s been in my head, fix a nice meal for my fam, clean up in the morning (an awesome tip to harness the shiz out of your evening), put a few drops of green food coloring in the tot’s bath to color it like the sea, they pick their bedtime books… but make them tell YOU a story as well. make up an incredibly ridiculous story for them right before you tuck- and give them a jumping off point for their dreams. (be prepared to do this every night… they’ll ask.) then get your dupa back to that reconnecting i talked about at the start of the spill. pat yourself on the back… and thank your Creator… whomever you believe that to be. tomorrow is a new day. bet the farm it’s gonna be great.

the four minute veggie
say ‘i love you’ with this stellar dessert next august.
anticipation


Blog at WordPress.com.

Up ↑

Cup of Jo

a pittsburgh hippie chick's unbridled love for all things food related

Everybody Likes Sandwiches

a pittsburgh hippie chick's unbridled love for all things food related

Sew Mama Sew

a pittsburgh hippie chick's unbridled love for all things food related

Not Without Salt

a pittsburgh hippie chick's unbridled love for all things food related